Why a Smartphone-Based Prep Plan Works (and Why It’s Trending)
Track days are getting more popular, but tire and brake prep is still where most first-time (and even experienced) drivers leave lap time and safety on the table. The good news: you don’t need an expensive data logger to build a reliable tire-and-brake plan. With a smartphone, a few inexpensive tools, and a repeatable process, you can reduce brake fade, avoid greasy tires, and gain consistency.
What makes this approach “modern” is that almost everyone already has the core sensor package in their pocket: GPS, accelerometer, a camera, and a stopwatch. Combine that with disciplined notes, and you can create a dependable baseline that’s tailored to your car, tires, track, and driving style—then improve it every session.
What You’ll Need (Budget-Friendly, Track-Proven)
- Smartphone with a lap timer app (any app that records lap times and allows notes works).
- Tire pressure gauge (digital preferred) with 0.5 psi resolution.
- Chalk marker or tire paint pen for sidewall/shoulder marks.
- Torque wrench (most passenger cars: commonly 80–100 ft-lb, but always confirm your spec).
- Basic hand tools and brake fluid tester (optional but helpful).
- Notebook or a notes template on your phone.
- Optional upgrades: IR thermometer (tire surface), cheap tread depth gauge, and a simple Bluetooth OBD-II reader for coolant temps.
Step-by-Step: Build Your Tire & Brake Prep Plan
1) Choose Your “Baseline Session” Goals (Before You Touch the Car)
Most track-day issues happen because drivers chase lap time before the car is ready. Set a clear baseline goal for your first two sessions:
- Goal A: Finish the session with consistent brake pedal feel (no long pedal, no vibration).
- Goal B: End with stable hot tire pressures (not wildly climbing).
- Goal C: Collect repeatable notes (pressure, temps, lap times, and “feel”).
Actionable tip: Decide your “stop point” for safety. Example: “If the brake pedal gets longer than normal twice in a lap, I’ll do a cooldown lap and pit.”
2) Build a One-Page “Pit Checklist” in Your Notes App
Create a template you’ll reuse at every event. Here’s a practical structure:
- Weather: ambient temp, sunny/cloudy, wind.
- Cold tire pressures (LF/RF/LR/RR): ___ / ___ / ___ / ___
- Hot tire pressures after session: ___ / ___ / ___ / ___
- Brake pedal feel: normal / longer / soft / pulsing
- Best lap + consistency: best ___; “spread” between laps ___ sec
- Driver notes: understeer mid-corner? rear step-out on exit? ABS early?
This is the foundation of your “no data logger” plan: disciplined, comparable notes.
3) Inspect Pads, Rotors, and Fluid Like a Race Tech (5 Minutes)
You’re not just checking for wear—you’re looking for predictable performance.
- Pad thickness: Don’t arrive with “barely enough.” For a typical track day, many drivers prefer starting with at least 50% pad life (more if the car is heavy or fast).
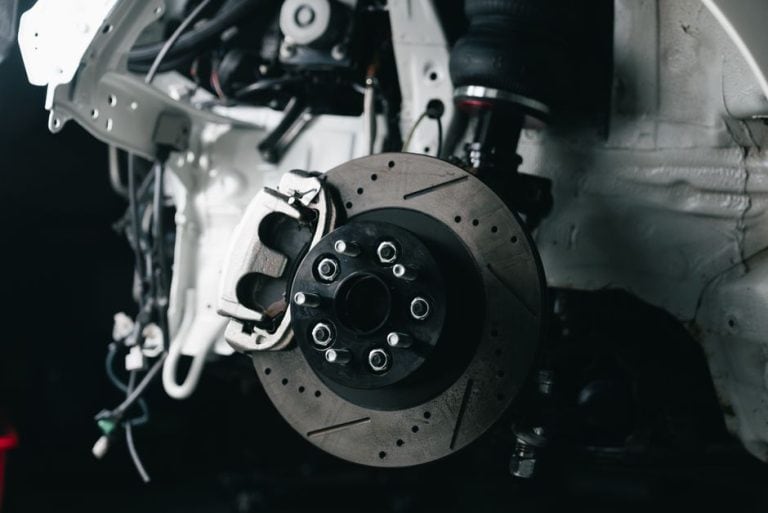
- Rotor condition: Light surface cracks can be normal on track rotors, but watch for deep cracks that reach the edge, heavy lips, or severe scoring.
- Brake fluid: If you don’t know its age, flush it. Fresh high-temp DOT 4 is a common choice for track days.
Real-world example: A 3,400–3,800 lb street car on 200-treadwear tires can burn through front pads shockingly fast at brake-heavy circuits. Showing up with thin pads is the fastest way to ruin a weekend—and sometimes rotors too.
4) Set Cold Tire Pressures Using a “Rise Target” (Not Guesswork)
Here’s the trick: instead of chasing a magic cold pressure, aim for a hot pressure window and a consistent pressure rise from cold to hot.
- For many street/track tires, a common pressure rise target is +4 to +8 psi from cold to hot (your tire and car may vary).
- If you see +10 psi or more quickly, you may be overdriving the tire, starting too low, or overheating due to long sessions and high ambient temps.
Actionable method: Start conservatively (manufacturer baseline or community baseline for your tire model). After Session 1, adjust cold pressures so that you land in your desired hot range by Session 2.
5) Mark Tire Shoulders to Diagnose Roll-Over in One Lap
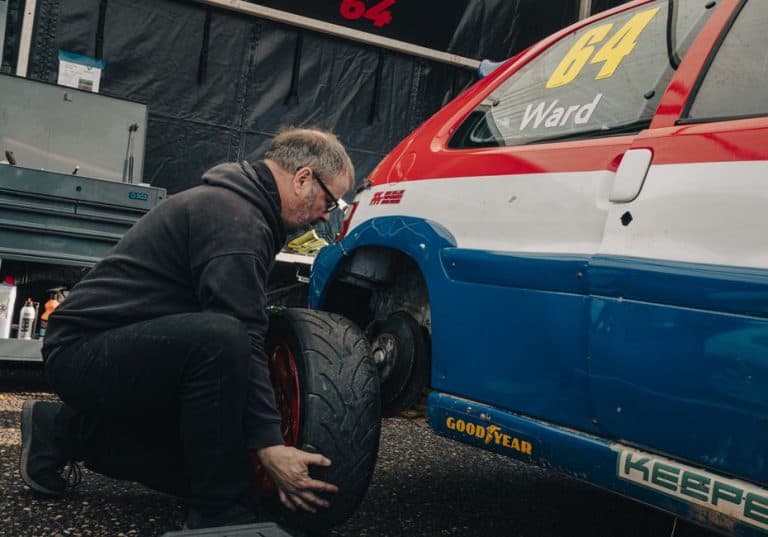
Use chalk or a tire paint pen to draw a thick line from the tread onto the sidewall shoulder at three points around each tire.
- If the marks are scrubbed far down the sidewall, the tire is rolling over (pressure too low, too much slip angle, or insufficient camber).
- If the marks barely wear at all and you’re sliding, the tire may be over-pressured or overheated.
Pro tip: This technique is simple but powerful because it gives you visual evidence without needing temperature probes or alignment racks at the track.
6) Use Your Smartphone to Track Consistency (Not Just the “Hero Lap”)
Lap time consistency is a proxy for grip management and brake repeatability. In your lap timer app, focus on:
- Best lap (great, but not the whole story)
- Median lap (what you can do repeatedly)
- Lap time spread (difference between typical laps and your best)
Actionable target: Try to get your “spread” under 1.0 second across 5–7 laps before pushing harder. Consistency often improves as your tire pressures and brake temps stabilize.
7) Run a Controlled Warm-Up: Two Laps to Save Your Brakes
Instead of charging immediately, use a deliberate warm-up:
- Lap 1: Build heat gradually in tires and brakes, avoid ABS triggers, and check for any vibration or pulling.
- Lap 2: Increase braking force to near-track pace, but keep it smooth.
This reduces the chance of glazing pads, overheating fluid early, or shocking cold tires into greasy behavior.
8) Mid-Session “Brake Fade Check” Using a Simple Repeat Point
Pick one consistent braking zone (same marker board, same approach line). Mentally note:
- Did the pedal get longer by lap 4–6?
- Are you braking earlier for the same corner with similar speed?
- Is ABS activating sooner than it did early in the session?
Actionable tip: If the pedal gets longer, do a cooldown lap immediately. Continuing to push can boil fluid or cook pads beyond their operating range.
9) Pit Immediately After the Session and Record “Hot” Pressures Within 60 Seconds
Tires cool quickly in the paddock. If you want meaningful data, check pressures fast.
- Pull in safely, park, and measure hot pressures in the same order every time (LF → RF → LR → RR).
- Record them and compare to your target.
- Bleed down pressure if needed to hit your hot window—then note the new “set” pressure for next session’s cold starting point.
Real-world example: If your tires jump from 30 psi cold to 40 psi hot, and the car starts pushing (understeer) mid-session, bleeding down to a more stable hot number can bring the balance back and protect the tire shoulders.
10) Create a Simple “If/Then” Adjustment Table (So You Don’t Guess)
Use your notes to create rules you follow event after event:
- If hot pressures rise more than +8 psi, then start 1–2 psi higher next time (reduces carcass flex/heat) and shorten push laps.
- If shoulder marks show roll-over, then add 1–2 psi or reduce steering input (smoother turn-in) and consider more front camber later.
- If pedal fades late session, then shorten sessions, add cooldown, and confirm fluid/pads are track-capable.
- If lap time spread grows, then focus on consistency and tire management, not more aggression.
11) Use “Street-to-Track Reality Checks” to Keep the Car Reliable
Track driving stresses parts in ways street miles don’t. Build these quick checks into your routine:
- Wheel torque: check after the first session and again at lunch.
- Fluid leaks: quick look under the car every time you park.
- Brake dust and heat signs: unusual smells, smoke, or discoloration are signals to back off.
Motorsport reliability is often just disciplined repetition.
12) Learn From Trends: Why Tires and Brakes Matter More Than Ever
Modern vehicles are heavier on average due to safety tech and electrification trends, and weight is hard on consumables—especially tires and brakes. If you’re curious about broader automotive trends and how they affect real-world driving and costs, mainstream reporting can provide useful context; for example, you can find ongoing transportation and auto coverage at The New York Times automotive and transportation section.
Practical takeaway: If your car is heavier than you think (check the door jamb GVWR sticker and look up curb weight), plan for faster pad wear and higher tire temperature. That means starting with more pad, watching pressure rise carefully, and doing disciplined cooldown laps.
Common Mistakes (and How to Avoid Them)
- Only adjusting front tires: Rear pressures can dramatically affect rotation and stability; measure all four every time.
- Chasing someone else’s pressures: Your alignment, weight, driving style, and track surface can shift ideal pressures by several psi.
- Ignoring cooldown laps: A cooldown lap is cheap insurance for fluid, pads, and tire life.
- Not writing anything down: Memory is unreliable in the paddock. Notes create progress.
Conclusion: Your Repeatable Track-Day Advantage
A track-day tire and brake prep plan doesn’t require a full race telemetry setup. With a smartphone, a pressure gauge, and a repeatable checklist, you can build a personalized baseline that improves every event. Focus on hot pressures, shoulder marks, and lap time consistency—not just a single fast lap. The result is more grip you can actually use, brakes that stay confident deep into the session, and a car that finishes the day ready for the drive home.
If you want to take it further, your next upgrades should be based on what your notes reveal: improved pads/fluid, an alignment for better tire wear, or a simple OBD-II reader for temps. But start here—because the best performance mod is a process you can repeat.