Why brake upgrades are the most misunderstood “fast mod”
If you’ve ever had a car that feels heroic for three laps and terrifying by lap six, you’ve met the real limiter of track-day pace: brake temperature management. Many drivers throw money at a big brake kit (BBK) because it looks like the obvious solution. Sometimes it is. Often, it isn’t.
This comparison breaks down four approaches to making brakes survive hard driving—brake ducting/cooling, high-temp pads & fluid, larger rotors/calipers (BBKs), and smart tire/braking technique changes. The goal is simple: more consistent braking, less fade, lower running costs, and confidence that lets you drive faster for longer.
The problem you’re trying to solve: heat, not “stopping power”
Modern performance cars can already lock ABS on street tires; the limiting factor on track is usually heat. Repeated high-speed stops convert kinetic energy into thermal energy. When temperatures climb:
- Pads fade (friction coefficient drops, longer pedal/longer stops).
- Fluid boils (compressible vapor in lines = soft pedal).
- Rotors crack or warp (thermal stress, uneven deposits).
Here’s a useful reality check. The energy you ask the brakes to absorb is huge. A 1,500 kg car slowing from 160 km/h (44.4 m/s) to 80 km/h (22.2 m/s) dumps roughly:
E ≈ ½·m·(v²−v²) = 0.5 × 1500 × (44.4² − 22.2²) ≈ 1.1 MJ
That’s about the energy of a small space heater running for several minutes—delivered in just a few seconds, over and over. So the best brake “upgrade” is often the one that helps the system manage heat efficiently.
Option 1: Brake cooling & ducting (often the highest ROI)
What it is
Brake ducting routes cool ambient air to the rotor’s center (hat) area so it can be pumped through the internal vanes. This helps remove heat during and between braking events. Proper ducting is not “blow air at the caliper”—it’s aimed at the rotor.
Pros
- Consistency: more stable pedal and friction across a session.
- Reduced consumable cost: pads/rotors can last longer when not overheated.
- Works with your existing hardware: especially effective on cars that are otherwise well-sized for track use.
Cons
- Installation complexity: routing hoses around suspension travel and steering lock takes planning.
- Durability: hoses can melt or tear if positioned poorly.
- Aero trade-offs: large duct inlets can add drag if badly placed.
Actionable tips that actually work
- Aim for the rotor hat: Use a backing plate with a duct spigot that feeds the rotor’s center, not the caliper face.
- Use high-temp hose: Silicone/fiberglass ducts resist radiant heat better than cheap plastic hose.
- Protect at full lock: Turn steering lock-to-lock while the car is at ride height and check clearance so the hose doesn’t rub a tire.
- Start with 2.5″ ducting for most street-track cars; go 3″ if packaging allows and you’re doing long sessions.
Real-world example
On heavier hot-hatches and compact sedans that regularly see track days, basic ducting plus track pads often transforms the car from “three laps and fade” to “full session.” It’s also a popular fix on cars that have decent factory calipers but poor airflow behind modern aero wheels.
Option 2: Track-focused pads + high-boiling brake fluid (the baseline you should do first)
What it is
This approach upgrades the friction material and the hydraulic fluid so the system holds up at higher temperatures. It’s the most common first step—and for good reason.
Pros
- Immediate improvement: higher-temperature pads resist fade.
- Safety: high boiling-point fluid reduces the chance of a long/soft pedal.
- Cost-effective: usually far cheaper than calipers/rotors.
Cons
- Noise/dust: many track pads squeal and produce heavy dust on the street.
- Cold bite: some compounds need heat to work properly.
- Not a cure-all: if rotors are undersized or airflow is poor, you can still overheat the system.
Actionable checklist
- Choose pads by temperature window, not brand hype. If your sessions are 15–20 minutes and you’re on sticky tires, pick a compound rated for higher sustained temps.
- Flush fluid more often than you think: for frequent track use, bleeding before events and full flushes several times a year is common practice.
- Bed pads properly to avoid uneven deposits that feel like warped rotors.
Data point to ground the decision
Boiling points matter because a caliper can see extreme temperatures under repeated heavy stops. Many performance brake fluids advertise dry boiling points above 300°C. In contrast, typical road-oriented fluids are far lower, and they degrade faster once moisture is absorbed. If you’ve ever experienced a pedal that goes long late in a session, fluid is usually the first suspect.
Option 3: Big brake kits (BBKs) and larger rotors (the right answer—when the math demands it)
What it is
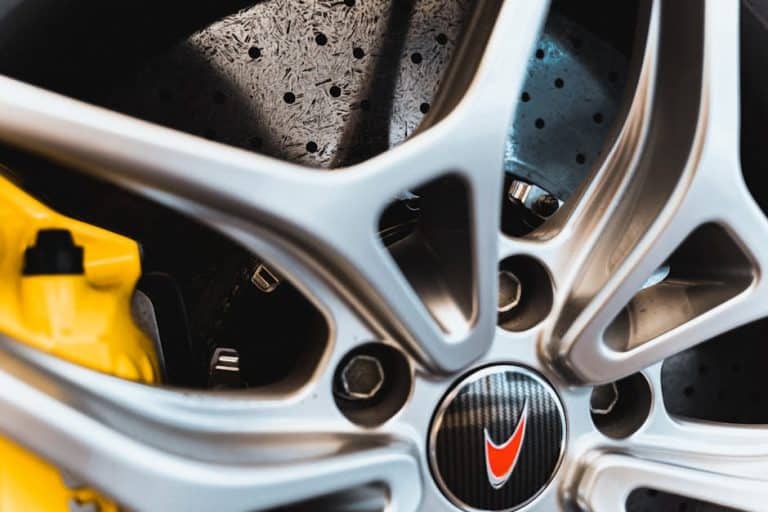
A BBK generally means larger diameter rotors, multi-piston calipers, better pad shape/area, and often improved rotor metallurgy and cooling vane design. The point is not cosmetic. It’s to increase the brake system’s thermal capacity and sometimes its mechanical torque leverage.
Pros
- More thermal mass: larger rotors absorb more energy before temps spike.
- Better cooling design: many two-piece rotors and directional vanes dissipate heat faster.
- Pedal feel and modulation: stiffer calipers can improve confidence near the limit.
Cons
- Cost: purchase price plus rotor rings, pads, and sometimes new wheels.
- Wheel fitment: you may need larger wheels or specific barrel profiles.
- Unsprung/rotational mass trade-offs: not all kits are lighter; some increase inertia.
When a BBK is justified
- Heavier cars (e.g., 1,700–2,000 kg) doing long sessions.
- High-grip tires (200TW or slick-like compounds) that allow higher decel and therefore more heat generation.
- Power increases that raise entry speeds (turbo upgrades, tuning).
- Repeated evidence of overheating: cracked rotors, blueing, pad material breakdown, or consistent fade even with good fluid/pads and proper cooling.
Real-world example: the “BBK but still fades” trap
It’s not uncommon for a driver to fit larger calipers and still struggle because they kept street pads or didn’t address airflow. A BBK is a system; if pad compound and fluid aren’t up to the job, the bigger hardware won’t magically prevent fade.
Option 4: “Hidden” upgrades—tires, alignment, and braking technique (free speed, lower heat)
What it is
Two drivers in identical cars can have wildly different brake temperatures based on entry speed discipline, trail braking control, and how smoothly they release pressure. Similarly, tire choice and alignment can change how hard you need to brake and how the car behaves under decel.
Pros
- Cheapest gains: many improvements cost little or nothing.
- Better lap times: smoother braking often equals earlier throttle and less ABS intervention.
- Reduced wear: less heat spike = longer life for pads/rotors/tires.
Cons
- Requires honesty and practice: technique changes aren’t instant.
- Not a hardware substitute if your brakes are fundamentally undersized for your use.
Actionable technique tips
- Brake in a straight line harder, for less time, then release smoothly. Long, dragged braking overheats components more than a firm, controlled application.
- Reduce ABS activation: constant ABS cycling can spike temps and extend stopping distances. Work on threshold braking.
- Cool-down lap discipline: take a proper cool-down lap without sitting on the pedal in the pits (that can imprint pad material on hot rotors).
Comparison: which approach fits your track-day reality?
1) The “first track day” or occasional lapping setup
- Best starting point: track-capable pads + high-temp fluid.
- Nice add-on: stainless lines (for feel) and a basic cooling strategy if the car is known to run hot.
2) The “monthly track day” driver chasing consistency
- Best value: pads + fluid + purposeful ducting.
- Consider: two-piece rotors or higher-quality rotor options if cracking becomes common.
3) The “sticky tires + power” build
- Most likely outcome: you’ll need a BBK or at least a larger rotor/caliper setup, plus cooling and correct pads.
- Don’t skip: ducting even with a BBK—heat management is still king.
4) The “heavy car” reality check
Weight is the silent killer of brakes. If you’re tracking a heavy AWD performance sedan or a modern EV, thermal loads rise quickly. Public reporting on brake particulate pollution has also highlighted how brake systems can be a significant source of non-exhaust emissions—another reason to prioritize durability and temperature control rather than repeatedly cooking pads and rotors. For broader context on the growing focus on non-exhaust emissions, see reporting at The Guardian’s coverage of brake and tyre pollution.
Cost-to-benefit snapshot (what most drivers should do in order)
- Step 1: Fresh high-temp brake fluid + proper bleeding.
- Step 2: Track-appropriate pads (and bed them correctly).
- Step 3: Brake cooling/ducting if you still see fade or excessive wear.
- Step 4: Upgrade rotors/calipers (BBK) when you’ve outgrown the system or increased grip/power/weight demands.
Conclusion: the fastest brake upgrade is the one that stays consistent
For most track-day builds, the best lap-time gain doesn’t come from the biggest caliper—it comes from repeatable braking. Start with pads and fluid, then add cooling to keep temperatures in the happy zone. Move to a BBK only when your data (fade, cracking, wear rates, session length, tire grip, vehicle weight) proves the factory-sized hardware is outmatched.
At Lasco Motorsport, the winning approach is always system-first: define the problem, choose the upgrade that addresses heat, and prioritize consistency over aesthetics. That’s how you brake later, carry more speed, and finish every session with the same confident pedal you started with.