

Karting Equipment Supply
We offer the entire line of karting gear such as chassis, engines, tyres, and other components. All products are thoroughly chosen to address the competition and provide a consistent performance.

Official Dunlop Kart Tyre Distribution
Dunlop Kart Tyres, being the official distributor of Dunlop Kart tyres in New Zealand, offer race proven tyre solutions, which have been trusted by the drivers all over the world. We also provide services in choosing the compound and race preparation guidance.

BRM & Rotax Package Deals
Lascom Motorsport is also a manufacturer of full kart packages which include BRM chassis and Rotax engines and are intended to provide drivers with reliable ready-to-race packages.

Race Support & Technical Guidance
We are also on the track concerning testing and karting races enabling us to offer on-track setup suggestions, tyre management tips, and performance information regarding the track conditions.


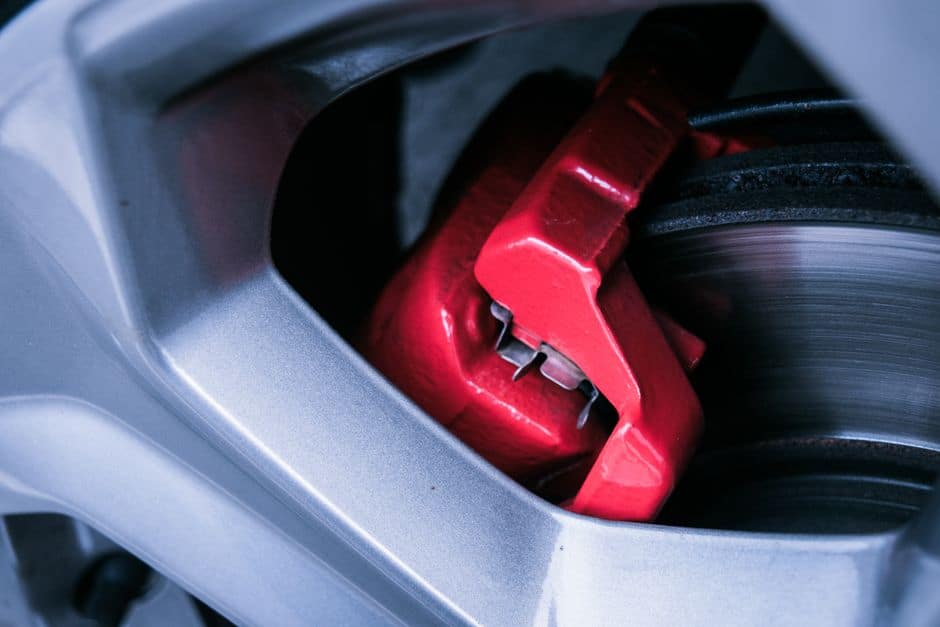
Brake Dust vs. Performance: An FAQ for Cleaner Wheels, Better Braking & Smarter Pad Choices
What exactly is brake dust—and why should Lasco Motorsport drivers care?
Brake dust is the fine, dark residue that collects on wheels, calipers, and sometimes along the rocker panels. It’s created when friction materials and the brake rotor surface wear during braking. If you drive spiritedly—mountain runs, autocross, track days, or even heavy city traffic—you’ll generate more of it.
Brake dust matters for three big reasons:
- Performance insight: Dust level can hint at pad compound choice, heat management, and rotor wear.
- Maintenance: Dust can bake onto wheel clear coat if neglected, making cleaning harder and potentially leading to staining.
- Health/environment: Dust becomes airborne and can settle in garages, driveways, and roadside areas.
Is brake dust “just dirt,” or is it actually made of harmful stuff?
It’s not just dirt. Brake dust is a mix of microscopic particles from the brake pad binder and fibers, plus metal from both the pad and rotor. Depending on pad type and vehicle use, you may see higher amounts of iron, copper, carbon, and other compounds.
On a practical level, the smaller the particles, the easier they become airborne—especially during wheel cleaning with brushes or compressed air. For a broader perspective on how tiny particles affect air quality and health, it’s worth exploring resources like National Geographic’s coverage on air pollution and particulate matter, which helps explain why minimizing and safely cleaning dust is smart in any garage setup.
Why do some brake pads dust like crazy while others stay relatively clean?
Brake pad dust output is mainly about compound chemistry and how the pad achieves friction:
- Performance/semi-metallic compounds often deliver strong bite and heat tolerance, but commonly produce darker, more visible dust due to higher metal content and aggressive friction behavior.
- Ceramic-based street pads tend to generate lighter-colored dust that may be less noticeable and sometimes less adhesive—but may trade off some initial bite or high-heat performance depending on the specific product.
- Track-focused pads can be extremely dusty because they’re engineered to work at higher temperatures and may abrade rotors faster during street use.
Real-world example: a daily-driven sport sedan running an aggressive track pad can coat front wheels in a single commute because the pad never reaches its intended temperature range, causing inefficient friction and rapid shedding of material.
How can I tell if my brake dust level is “normal” or a sign of a problem?
Some dust is normal. Look for these clues that suggest you should investigate further:
- Sudden increase in dust on one wheel only (possible stuck caliper slide pin, dragging pad, or uneven pad wear).
- Dust plus vibration under braking (possible rotor thickness variation, pad deposits, or uneven bedding).
- Dust plus squeal that’s new or worsening (could be pad glazing, missing shims, worn hardware, or compound mismatch).
- Dust plus burning smell after normal driving (possible dragging brakes or overheated pads/rotors).
Actionable tip: after a normal drive with moderate braking, carefully hover your hand near (not on) each wheel to compare heat. A significantly hotter wheel on one corner can indicate dragging brakes and will almost always come with heavy dust on that wheel.
What’s the best way to reduce brake dust without sacrificing braking performance?
Reducing dust while keeping strong braking is about choosing the right pad for your use case and supporting it with good hardware and technique.
1) Match pad compound to your real driving
- Street performance daily: Look for low-dust “street performance” compounds known for stable cold bite.
- Street + occasional canyon runs: Consider a pad marketed for spirited street use with higher temp ceiling.
- Track days: Accept that dust will increase. Prioritize consistent coefficient of friction at temperature.
2) Bed pads correctly
Incorrect bedding can cause uneven transfer layers on the rotor, which can increase dust, noise, and vibration. Follow the manufacturer’s bedding procedure. If none is provided, a common approach is a series of moderate stops from ~40–60 mph down to ~10 mph, with cool-down driving afterward—without coming to a complete stop while the brakes are extremely hot.
3) Maintain caliper hardware
Sticky slide pins or worn abutment clips can cause pad drag. That creates extra dust and heat and can warp your “feel” long before you notice obvious braking issues.
Do drilled or slotted rotors reduce brake dust?
Not directly. Slots can help wipe the pad surface and reduce glazing, which may help maintain consistent bite, but they can also increase pad wear in some cases—meaning potentially more dust.
Drilled rotors can improve wet performance in certain scenarios and reduce some gases (more relevant historically), but they can be more prone to cracking under repeated high-heat cycles if the design or usage isn’t appropriate.
Practical takeaway: if dust reduction is your goal, pad selection and caliper condition matter more than rotor aesthetics.
What’s the safest, most effective way to clean brake dust from wheels?
Wheel cleaning is where many enthusiasts accidentally create airborne dust. Here’s a safer, effective process:
- Clean when cool: Never spray cleaner on hot wheels/rotors; it can stain finishes and evaporate quickly.
- Rinse first: Use a strong water rinse to remove loose grit before touching the wheel.
- Use a dedicated wheel cleaner: pH-balanced cleaners are often safer for coated wheels. Iron-removers help dissolve embedded metallic particles (follow instructions and don’t let it dry).
- Use soft brushes and multiple towels: Keep a separate wheel towel set to avoid contaminating paintwork with metallic particles.
- Wear nitrile gloves and avoid compressed air: Blowing dust around is exactly what you don’t want in a closed garage.
Actionable tip: if you track the car, consider a quick rinse immediately after the event (once everything is cool). Dust is easier to remove before it bakes onto the clear coat.
Will ceramic coating or wheel sealant really help with brake dust?
Yes—mostly by making cleaning easier, not by stopping dust creation. A quality wheel ceramic coating or high-temp sealant reduces how strongly dust bonds to the wheel surface. That means less scrubbing (and less agitation = less dust becoming airborne).
Real-world expectation: coated wheels still get dirty, but maintenance often becomes a rinse + gentle wash instead of harsh chemicals and heavy brushing.
How do I choose low-dust brake pads without ending up with “wooden” pedal feel?
“Low dust” shouldn’t mean “low confidence.” Use this checklist:
- Check cold bite reviews: For daily driving, you want predictable friction at ambient temperatures.
- Look for linear modulation: The best street pads build braking force smoothly rather than feeling grabby or numb.
- Confirm proper fitment: The correct pad shape and hardware reduce noise and uneven wear.
- Don’t overspec: A track pad on the street can feel worse when cold and dust more.
Data point to watch: pad makers often list an operating temperature range. If your driving rarely heats the brakes, choose a compound designed to work cold.
Is there a “dust pattern” that tells me something about my braking technique?
Often, yes. Patterns to notice:
- Front wheels much dirtier than rear: Normal for most cars due to front brake bias.
- One front wheel dramatically dirtier: Possible caliper drag or uneven pad contact.
- Dust plus tiny black specks on light paint near the wheels: You may be flinging dust during aggressive driving or cleaning. Consider sealant/coating and gentler cleaning methods.
Technique tip for enthusiasts: smooth, progressive braking can reduce unnecessary pad abrasion compared to repeated abrupt stabs, especially in traffic. On track, however, firm braking in the correct zones is safer and usually more consistent than “dragging” the brakes, which can overheat pads and increase dust and deposits.
What quick garage checks can prevent excessive dust and uneven wear?
These checks are simple and can save you from replacing pads/rotors early:
- Inspect pad thickness evenly: Compare inner vs. outer pads; big differences suggest sliding issues.
- Check rotor surface: Look for heavy scoring, cracking, or blue heat spots.
- Listen for changes: New scraping or grinding means stop and inspect immediately.
- Torque wheels correctly: Uneven lug torque can contribute to brake vibration complaints that lead people to chase “dust problems” that are really bedding or rotor issues.
Conclusion: What’s the smartest brake-dust strategy for performance-minded drivers?
Brake dust is a normal byproduct of turning speed into heat—but it’s also feedback. If you want cleaner wheels and confident braking, focus on the fundamentals: pick a pad compound that matches your real driving, bed it properly, keep calipers and hardware in top shape, and use safe cleaning methods that don’t turn dust into airborne particles. Add wheel protection (sealant or ceramic coating) to make maintenance faster and gentler.
If you’re upgrading your setup for spirited road driving or track use, treat dust as a tradeoff you can manage—not just a cosmetic annoyance. Done right, you’ll have better pedal feel, more consistent stops, and wheels that clean up with far less effort.

The Personal Pit-Stop System: An FAQ Guide to Building a Weekly Routine That Actually Sticks
What is a “Personal Pit-Stop System,” and why is it a better way to plan a week?
A “Personal Pit-Stop System” is a weekly routine designed around short, repeatable check-ins—like scheduled pit-stops—rather than one big planning session that you forget by Tuesday. The idea is simple: you don’t need a perfect life overhaul; you need a reliable cadence for refueling your energy, checking your direction, and fixing small issues before they become big ones.
This approach works well because it accepts two realities:
- Your week will change. A system that expects perfection breaks quickly.
- Small course corrections beat rare big resets. A 10-minute midweek recalibration prevents wasted effort.
Instead of relying on willpower, you create a repeatable structure for deciding what matters, when you’ll do it, and what you’ll stop doing.
Why do routines fail even when motivation is high?
Most routines fail due to design, not discipline. Common failure points include:
- Overloading the schedule: Planning a “perfect” week leaves no buffer for delays, fatigue, or surprises.
- Unclear priority logic: You have a to-do list, but no rule for what gets done first.
- Energy mismatch: Scheduling deep work at your lowest-energy times creates repeated broken promises to yourself.
- All-or-nothing thinking: Missing one workout or one planning session becomes an excuse to abandon the system.
A pit-stop system fixes this by making failure small and recoverable: when you slip, you don’t “restart,” you simply take the next pit-stop.
What are the core parts of a Personal Pit-Stop System?
A practical pit-stop system has five elements you can keep consistent even when life gets busy:
- Weekly Briefing (30–45 minutes): Decide your focus, set boundaries, and pre-commit to a few key actions.
- Daily Start Line (5 minutes): Choose today’s “Top 1–3” and identify your first action.
- Midweek Recalibration (10–15 minutes): Fix scheduling drift, renegotiate deadlines, and update priorities.
- Micro Pit-Stops (60–120 seconds): Fast resets between tasks: hydrate, breathe, clarify next step.
- Weekly Debrief (10 minutes): Review wins, identify bottlenecks, and improve the system for next week.
These are not productivity “hacks.” They’re maintenance intervals that keep your week from slipping off track.
How do I set up my Weekly Briefing so it doesn’t become a long, stressful planning marathon?
Use a simple checklist and stop once you’ve made the key decisions. Here’s a structure that stays under 45 minutes:
1) Check the calendar first (5–10 minutes)
Look at fixed commitments (work meetings, travel, family obligations). Planning from your calendar prevents impossible schedules.
2) Choose one “Main Objective” for the week (5 minutes)
Ask: If only one meaningful thing moves forward this week, what should it be? Examples:
- Finish a certification module
- Complete a medical appointment you’ve delayed
- Submit a proposal or portfolio update
3) Pick 2–3 “Supporting Objectives” (5 minutes)
These are smaller, complementary goals like workouts, meal prep, or admin clean-up.
4) Identify constraints and create buffers (10 minutes)
Add at least 2–4 hours of unscheduled buffer across the week. If your job or family schedule is unpredictable, increase that buffer.
5) Pre-commit to your first actions (10–15 minutes)
Turn goals into appointments. Instead of “work on taxes,” schedule “gather W-2 + receipts, 30 minutes Tuesday 7:30 PM.”
What’s the easiest way to decide what to do first each day?
Use a “Start Line” rule: pick one Priority Task and define the first physical action that starts it. A priority task is the thing that makes other tasks easier or unnecessary.
Examples of turning vague goals into startable actions:
- “Get healthier” → “Put walking shoes by the door and walk 12 minutes after lunch.”
- “Organize finances” → “Log into bank app and export last month’s transactions.”
- “Grow my business” → “Draft 5 outreach messages and send 2 today.”
This works because clarity lowers friction. If you know the first step, you’re less likely to stall.
How can I match tasks to my energy instead of fighting myself all day?
A simple, effective method is to assign tasks to one of three energy gears:
- High gear: creative work, problem-solving, writing, learning
- Medium gear: meetings, planning, collaboration, editing
- Low gear: email cleanup, admin, errands, scheduling
Then align your day around your most reliable energy window. Many people experience better focus earlier in the day, but your pattern might differ (night shift workers, caregivers, and students often have different “high gear” windows).
Actionable tip: For one week, record your energy level (1–5) three times per day (morning/afternoon/evening). After 7 days, schedule your “High gear” tasks during your best average time slot.
What is a Midweek Recalibration, and how do I do it in 15 minutes?
A Midweek Recalibration is a short reset that prevents your plan from collapsing when Monday optimism meets Wednesday reality. Here’s a quick format:
- What changed? (new tasks, delays, surprises)
- What must still happen? (non-negotiables)
- What can move or shrink? (reduce scope, postpone, delegate)
- What’s the next best step? (schedule it)
Real-world example: If you planned to do three workouts but work became intense, recalibrate to two shorter sessions (20–25 minutes) instead of quitting entirely. The system stays intact because it adapts.
How do I build a routine that survives “bad days” and unexpected disruptions?
Design for minimum viable consistency. Create a “Baseline Day” version of your routine—what you do when everything goes wrong but you still want to maintain momentum.
A Baseline Day might include:
- 10 minutes of movement (walk, mobility, stretching)
- One prioritized task for 15 minutes
- 5-minute tidy reset
- Prepare one simple meal or make a healthier default choice
This is not about doing less forever; it’s about never hitting zero. In behavioral terms, consistency strengthens identity (“I’m someone who shows up”), which makes it easier to ramp back up.
What are practical ways to reduce distraction without deleting every app?
You don’t need extreme measures to reduce distraction—you need strategic friction. Try these methods:
- Notification triage: turn off all but human-to-human essentials (calls/text from key contacts).
- Single-tab rule: keep one browser window for the current task; close everything else.
- Timed access: allow social apps only after a defined “finish line” (e.g., after your Priority Task).
- Environment cues: put your phone in another room for 25 minutes; distance is powerful.
If you want to understand how attention and modern media habits affect daily life, The New York Times frequently publishes reporting and analysis on technology, attention, and behavioral trends that can help you make more informed choices about your media diet.
How can I measure progress without turning life into a spreadsheet?
Use a “3-marker scoreboard” that takes under two minutes per day. Choose three markers that represent the kind of week you want. Example:
- Health: movement minutes (e.g., 20+)
- Work/Learning: 60 minutes of focused effort on your Main Objective
- Life/admin: one household or finance task completed
Each day, mark yes/no (or a small number). At the end of the week, you’ll have a realistic view of your consistency. This is more useful than tracking 15 metrics that you abandon after four days.
Can you share a real-world example of a Personal Pit-Stop week?
Here’s an example for someone balancing a full-time job, fitness goals, and personal projects:
- Weekly Main Objective: finish a draft of a professional portfolio update
- Supporting Objective #1: 3 workouts
- Supporting Objective #2: meal prep basics (two proteins + one carb base)
Scheduled pit-stops:
- Sunday 5:30 PM: Weekly Briefing + schedule two 60-minute portfolio sessions
- Mon–Fri 8:40 AM: Daily Start Line (Top 3 + first action)
- Wednesday 6:00 PM: Midweek Recalibration (adjust workouts if needed)
- Friday 6:30 PM: Weekly Debrief (note what blocked progress)
Why it works: the portfolio work is protected with real calendar time, workouts are flexible (including a Baseline option), and the midweek reset prevents falling behind from becoming quitting.
What’s the biggest mistake people make when trying to implement a weekly system?
The biggest mistake is trying to change everything at once. If you overhaul sleep, diet, exercise, work habits, and social media boundaries in the same week, your routine becomes fragile.
Better approach: change one lever per week. For example:
- Week 1: implement Daily Start Line only
- Week 2: add Weekly Briefing
- Week 3: add Midweek Recalibration
Once the system is stable, then optimize.
Conclusion: How do I start today in under 10 minutes?
To start your Personal Pit-Stop System today, do this:
- Write one Main Objective you want to move forward this week.
- Choose one Priority Task for today that supports it.
- Define the first physical action (open document, put shoes on, make the call).
- Schedule a 15-minute Midweek Recalibration on your calendar right now.
The goal isn’t a perfect week—it’s a week you can steer. With consistent pit-stops, you’ll spend less time “starting over” and more time moving forward.

12 Smart Mechanical Service Tips for Track-Day & Street Cars: Brake Dust, Heat Soak, and Hidden Wear
Why this roundup matters (and why it’s not “just another maintenance list”)
Most mechanical service advice is built around average commuting: gentle heat cycles, predictable road conditions, and long gaps between hard stops. But if your car lives a “dual life” — weekday street duty and weekend spirited driving, autocross, canyon runs, towing, or track days — the wear patterns look totally different. Heat, vibration, repeated high-load braking, and rapid temperature swings expose problems earlier and in less obvious ways.
This roundup collects practical, shop-floor tips you can actually use to keep performance-minded street cars reliable. Think of it as a checklist for the kinds of failures that don’t show up on a standard service menu: heat-soaked brakes, fluid fade, bushing creep, wheel bearing noise that appears only hot, and “mystery vibrations” caused by small alignment changes under load.
1) Build a “two-tier” service schedule: street intervals vs. high-load intervals
One of the most useful mindset shifts is separating your service plan into two intervals:
- Street interval (normal mileage/time): oil changes, cabin filters, basic inspections.
- High-load interval (events/hours): brake fluid, pad thickness, torque checks, tire inspections, and underbody fastener checks.
Actionable tip: track your hard-use time. A simple note like “2 track sessions + 300 spirited miles” is more meaningful than mileage alone for brakes and fluids.
2) Treat brake fluid like a performance part, not a lifetime fill
Brake fluid is hygroscopic (it absorbs moisture), and moisture lowers boiling point. In high-load driving, fluid can boil, causing a long pedal or sudden fade. Even on the street, repeated downhill braking or towing can elevate caliper temperatures.
- Street-focused cars: consider a brake fluid flush every 2 years (or sooner if the pedal feel changes).
- Track/spirited use: flush more frequently (often every few events depending on heat exposure).
Quick check: if your pedal firms up when cool but gets longer after repeated stops, you may be nearing fluid limits or dealing with pad knockback.
3) Brake dust tells a story: learn what “normal” looks like for your setup
Brake dust isn’t just cosmetic. It can reveal uneven pad transfer, dragging calipers, or one corner doing more work than the others.
- One wheel much dirtier: possible sticking caliper slide pin, seized piston, or collapsed hose.
- Dust suddenly increases after pad swap: bedding may be incomplete, or the compound is too aggressive for your street use.
- Dust + vibration under braking: could be uneven pad deposits (often mislabeled as “warped rotors”).
Real-world example: If your front-left wheel is consistently darker after identical drives, that corner may be dragging slightly — something that can overheat the rotor and shorten bearing life over time.
4) Don’t just measure brake pads — measure taper
Many drivers check “pad thickness” and stop there. But taper (one end of the pad thinner than the other) is a common performance and safety issue.
- What it points to: caliper alignment issues, seized slide pins, worn bushings, or caliper bracket flex under heat.
- How to check: pull pads and compare inner vs. outer and leading vs. trailing edges. A small amount can be normal; pronounced taper deserves investigation.
Actionable tip: if you regularly run hard, add a pad-taper check to your pre-event inspection. Catching it early can prevent uneven braking and expensive rotor damage.
5) Heat soak is the silent killer of “perfectly fine” components
Heat soak is when heat from the engine, brakes, and exhaust migrates into nearby components after a hard run. Problems often appear in the 10–30 minutes after you park.
- Symptoms: hot-start issues, intermittent sensor faults, soft brake pedal after a cooldown lap, or odd idle behavior.
- Mechanical angle: rubber hoses, plastic connectors, coil packs, and wiring insulation are often the first to suffer.
Actionable tip: after any high-load drive, pop the hood and let heat escape before shutting down for the day (where safe). It can reduce under-hood heat saturation.
6) Torque checks are not optional when vibration is the complaint
Wheel lug torque, suspension fastener torque, and brake hardware torque matter more than most people realize — especially after wheel swaps, brake jobs, or track days. A small loosening can become a big issue quickly.
- When to re-torque: after installing wheels, after first heat cycle, and periodically during event days.
- What to look for: elongated bolt holes, shiny witness marks around fasteners, or a change in steering feel under braking.
Pro tip: use a torque wrench and follow a star pattern. “Impact-gun tight” is not a spec.
7) Alignment for “fast street” is different than alignment for “quiet street”
Some alignment settings that make a car feel stable and responsive can also increase tire wear if you commute long distances. The key is to decide what you value most and set a realistic compromise.
- More negative camber can protect tire shoulders during hard cornering but may wear inner edges faster.
- Toe settings drastically affect stability and wear. Even small toe changes can scrub tires quickly.
Actionable tip: ask your shop for printouts and keep them. Comparing “before vs. after” helps diagnose whether handling changes are tire-related or alignment-related.
8) Use tire temperatures and wear patterns as a diagnostic tool
You don’t need professional motorsport equipment to learn from your tires. Even a simple tread depth gauge can reveal a lot.
- Outer edge wear often suggests insufficient camber or underinflation for the load.
- Center wear often points to overinflation.
- Feathering can indicate toe issues or worn suspension components.
Real-world example: If the front tires feather after a single weekend of aggressive driving, toe may be shifting under braking due to worn control arm bushings — something that might not show up during a quick visual inspection.
9) Listen for “hot-only” wheel bearing and CV joint clues
Some bearing noise doesn’t show up until parts expand with heat. A bearing might be quiet cold and noisy hot, or only during long sweeping turns.
- Wheel bearing hint: humming that changes when you gently load/unload the car left/right.
- CV joint hint: clicking under acceleration while turning, often more noticeable after heat builds.
Actionable tip: when diagnosing, note temperature and conditions. “Only after 30 minutes of highway driving” is a powerful clue for a technician.
10) Small oil changes matter: consider used oil analysis for pattern tracking
If you’re serious about reliability, a used oil analysis can help detect trends: rising wear metals, coolant contamination, or fuel dilution. It’s especially useful for turbocharged engines, direct injection setups, and vehicles that see repeated heat cycles.
- Good use case: comparing results across 2–3 oil changes to see trends, not just one snapshot.
- Actionable tip: take samples consistently (same interval, similar driving mix) to make results meaningful.
11) Plan your parts strategy around supply-chain reality
One overlooked mechanical-service trend is that parts availability can impact downtime. If your car is both transport and hobby, waiting weeks for a specialty component is painful.
- Keep spares: a set of front pads, a brake fluid bottle, a serpentine belt, and common sensors can save a weekend.
- Order ahead: if an inspection shows 30% pad life and you have an event in a month, order now.
Broader reporting on the way shortages and logistics have affected vehicle ownership costs has been covered by major outlets, including The New York Times, and it’s a reminder that “just fix it later” isn’t always practical anymore.
12) Create a “post-event” inspection routine you can do in 20 minutes
Consistency beats complexity. Here’s a quick routine many enthusiasts follow after hard use:
- Wheels/tires: inspect for cuts, bubbles, cords, and abnormal wear; check pressure when cold next day.
- Brakes: look through wheels for pad thickness; check for cracking or heavy grooving on rotors.
- Fluids: check brake fluid level, engine oil level, and look for new leaks under the car.
- Underbody glance: check for fresh scrapes, loose undertrays, or dangling clips.
- Listen test: on the next drive, note any new clicking, humming, or steering wheel shake.
Actionable tip: keep a simple checklist on your phone. If you write down one change each time, you’ll spot patterns long before they become failures.
Conclusion: Mechanical service that matches how you actually drive
Performance-minded driving doesn’t have to mean unreliable driving. The trick is to service the parts that heat, flex, and wear differently under load — brake fluid, pads, suspension bushings, wheel bearings, and alignment settings — and to track “events and heat cycles” alongside mileage.
If you want your car to feel sharp on the weekend and calm on Monday, adopt the two-tier schedule, learn the clues in brake dust and tire wear, and make quick inspections a habit. The payoff is fewer surprises, more confidence, and a car that stays enjoyable for the long run.

9 Data-Driven Ways Club Racers Can Cut Lap Times Without Buying More Power
9 Data-Driven Ways Club Racers Can Cut Lap Times Without Buying More Power
Horsepower is the glamorous fix, but most club racers and track-day regulars leave chunks of lap time on the table with the car they already have. The fastest gains often come from repeatable process: using data, controlling variables, and making changes you can validate. Below are nine specific, less-talked-about (but highly effective) ways to find speed—without chasing big power upgrades.
Each tactic is designed for real-world motorsport budgets and typical weekend constraints. Pick two or three, apply them for a month, and you’ll usually see more progress than a year of random parts.
1) Build a “Brake Release Map” (Not a Brake Marker)
Many drivers can tell you where they brake. Far fewer can describe how they release the brake. Yet brake release is where you win time: it sets front grip, rotation, and minimum speed.
- Actionable drill: For three sessions, keep your brake marker constant, and focus only on releasing the brake smoothly (tapering pressure) while maintaining a stable steering rate.
- Data cue (even with basic tools): If you have GPS data, look at speed trace into the apex. A smoother release often shows a higher minimum speed and less “V-shape” cornering.
- Practical example: In medium-speed corners, a clean release can be worth 0.1–0.3s per corner because the car rotates sooner and you can pick up throttle earlier without understeer.
Tip: Film your feet. A cheap cabin camera aimed at the pedals often reveals you’re coming off the brake too abruptly, which spikes understeer and costs exit speed.
2) Measure Tire Temperatures Across the Tread—Then Adjust Driving, Not Just Pressures
Most drivers check hot pressures and stop there. Tire temperatures (inner/middle/outer) tell you why grip is inconsistent.
- Tools: A probe-style pyrometer is ideal, but even an infrared gun is better than guessing.
- Target pattern (general): For many track tires, you want relatively even temps with slight inner bias on negative camber setups (exact targets vary by tire and car).
- Driving adjustment: If the outer shoulder is hottest, don’t immediately add camber—first check if you’re turning in too early and scrubbing the front tires with excess steering angle.
Track-day reality: A 2–3 psi pressure mistake can turn into a 5–10°C temperature imbalance and a car that feels “random” by lap 4.
3) Use Fuel Load as a Setup Tool (and a Consistency Test)
Fuel load changes balance, braking, and tire life. Instead of treating it as an inconvenience, use it intentionally.
- Baseline method: Do one session with a heavier fuel load (e.g., +15–20 liters over your usual) and one with your typical load. Compare your braking stability and mid-corner balance.
- What you learn: If the car is only “good” at one fuel level, your setup window is too narrow or your driving relies on a specific balance that won’t last in a race.
- Racecraft bonus: A driver who understands fuel-balance changes is less likely to overdrive early and cook tires.
Data point to watch: Compare corner entry speed on lap 2 versus lap 8 in both sessions. Consistency often improves more than raw lap time—until it becomes raw lap time.
4) Create a “Two-Lap Quali Routine” That Actually Works
Many club racers lose their best lap before it begins: incorrect warm-up pace, sloppy out-lap, or overheating tires. A simple two-lap routine can unlock pace reliably.
- Out-lap: Heat brakes progressively. Avoid big steering inputs that scrub tires. Build pace in the last 1/3 of the lap.
- Hot lap 1: Commit to clean inputs, not heroics. Most drivers over-attack the first braking zone.
- Hot lap 2: If tires are in the window, this is often fastest. If it’s slower, note where grip falls off—front? rear? only in long corners?
Quick check: If lap 1 is fastest and lap 2 drops sharply, you’re likely overheating tires or overdriving entries. If lap 2 is faster, your out-lap was too gentle.
5) Optimize “Aero for Free” with Ride Height Discipline and Sealing
You don’t need a wind tunnel to benefit from aero fundamentals. Many cars lose stability because ride height changes under braking and acceleration, or because air is leaking into places it shouldn’t.
- Ride height: Measure it consistently (same tire pressures, same surface). Even a few millimeters can change rake and high-speed balance.
- Sealing basics: Check front undertray gaps, damaged splitter edges, loose wheel-arch liners, and missing fasteners. These “small” issues can cause big changes at 160+ km/h.
- Real-world payoff: More stability through fast corners typically increases your confidence to stay on throttle earlier—often worth more than a power bump.
Workshop tip: Paint-pen mark critical aero fasteners so you can visually spot loosening between sessions.
6) Stop Guessing the Weather: Build a Grip Forecast from Track Temp
Ambient temperature is not the same as track temperature. Track temp influences tire pressure rise, grip level, and braking distances.
- Tools: A simple infrared thermometer pointed at the asphalt in the pits (and near the racing line if safe) before each session.
- Log it: Track temp + hot pressures + best lap + driver notes. After 3–4 events you’ll have a personal grip model.
- Actionable adjustment: On hotter track temps, you may need lower starting pressures and a calmer first two laps to prevent overheating.
Context: Mainstream reporting increasingly highlights how heat impacts motorsport performance and safety; for broader background on racing conditions and their real consequences, resources like The Guardian’s motorsport coverage can provide useful perspective beyond the paddock rumor mill.
7) Make One Change at a Time—But Use an A/B “Control Lap” to Validate
“One change at a time” is good advice, but it fails when your driving varies lap-to-lap. The fix is to create a repeatable control lap and compare like-for-like.
- Control lap definition: Pick a lap where traffic is clear and you execute your plan (brake points, gears, lines). Mark it in your notes.
- A/B method: Do 3 laps with Setup A, then 3 laps with Setup B (or tire pressure A/B). Compare the best “clean” lap from each set plus consistency (spread between laps).
- What to change first: Tire pressures, then alignment tweaks, then damping/ARB changes. Avoid stacking variables.
Rule of thumb: If the “improvement” only shows up in one corner and hurts two others, it’s likely not a net gain for race distance.
8) Practice “Delta Throttle” on Corner Exit (It’s Not Just ‘Full Throttle Earlier’)
Drivers often focus on when they reach full throttle. The faster insight is the rate at which you add throttle—especially on cars with limited-slip diffs or turbo torque spikes.
- Delta throttle concept: Think of throttle as a ramp. A smooth ramp keeps the tire at the limit; a spike breaks traction and forces a lift.
- Drill: On exits, aim for a consistent 1–2 seconds from maintenance throttle to full (adjust per corner). If you’re fighting wheelspin, lengthen the ramp.
- Data cue: Look for a clean, rising speed trace with no micro-lifts. Even without data, you’ll feel less correction at the wheel.
Example: In FWD cars, a calmer throttle ramp reduces inside-wheel spin; in RWD, it preserves rear tire temp and reduces snap oversteer when the diff locks.
9) Do a Post-Session “3-2-1 Debrief” (and Actually Use It Next Time)
Most drivers have great insights right after a session—and then forget them. A structured debrief turns feelings into a plan.
- 3 observations: What the car did (understeer entry, oversteer exit, brake vibration, etc.).
- 2 hypotheses: Why it happened (pressure too high, braking too late, overheating, diff behavior).
- 1 action: One specific change for the next session (start pressures -1 psi, later turn-in at Turn 4, smoother brake release).
Bonus: Keep a simple spreadsheet. After a season, patterns emerge—like which corners punish you when the track heats up, or which setup change consistently improves tire life.
Conclusion: Speed Comes from Process, Not Parts
Cutting lap time without buying power is absolutely realistic—if you treat performance like a system. Brake release, tire temperature management, fuel-load awareness, a repeatable quali routine, basic aero discipline, track-temp logging, controlled A/B testing, smarter throttle application, and structured debriefs add up quickly.
If you want the biggest payoff, start with tire temps + pressures and brake release mapping for your next event. They’re low-cost, highly measurable, and they make every future setup change more effective. Lasco Motorsport readers: keep it methodical, keep it safe, and let the stopwatch—not forum noise—tell you what works.
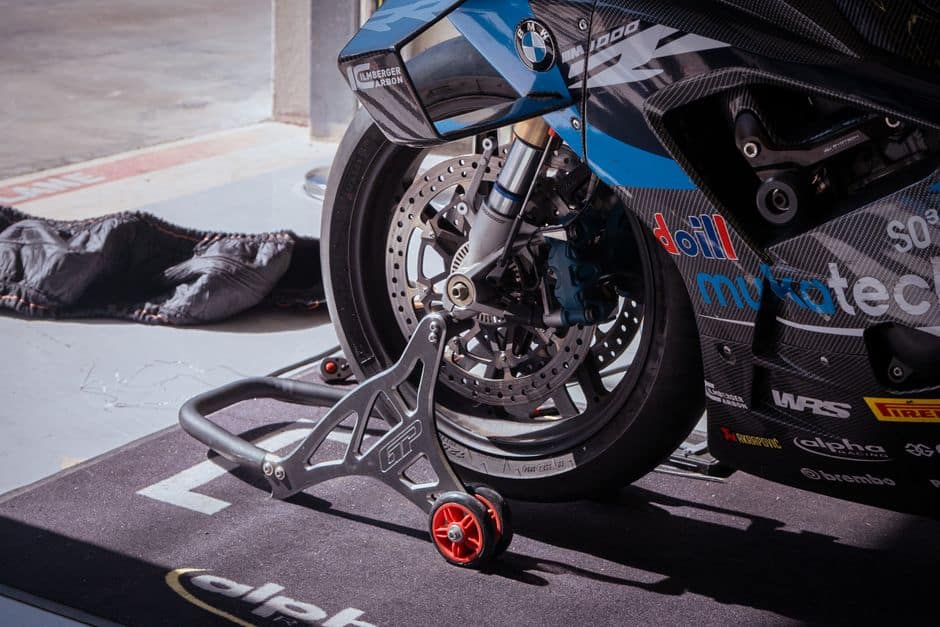
Track-Day Ready on a Budget: 13 High-Impact Upgrades & Habits That Actually Drop Lap Times
Why “budget track prep” is trending (and what actually works)
More drivers than ever are taking daily-driven cars to HPDEs, autocross, and open lapping days—then discovering a hard truth: the fastest “mods” are often the least glamorous. Social feeds love big turbos and widebody kits, but most weekend warriors gain more time (and safety) from brakes, tires, fluids, alignment, and driver process than from chasing horsepower.
This roundup focuses on specific, high-leverage upgrades and habits that make a real difference without turning your car into an unreliable science project. Each item includes actionable tips and real-world context so you can build a track plan that fits your budget and goals.
Roundup: 13 upgrades & habits that move the needle
1) Start with a “heat budget,” not a parts list
Track performance is mostly heat management: brakes heat up, tires heat up, oil and coolant heat up, and drivers heat up. Before buying anything, define your heat budget:
- Session length: 15–20 minutes vs. 30 minutes changes needs dramatically.
- Car weight: heavier cars consume pads/tires faster and heat brakes sooner.
- Power level: more speed = more braking energy and higher tire temps.
Actionable tip: Write down three constraints—max session length, desired pace (novice/intermediate/advanced), and whether you must drive the car home. Your purchases should support those constraints first.
2) Track-capable brake fluid: the cheapest confidence boost
Boiled fluid is one of the most common first-track failures, and it can happen even with “good pads.” A quality high-temp fluid (and a proper bleed) often transforms pedal feel and consistency.
- Flush thoroughly before your first event and again mid-season if you track often.
- Bleed after each event if the pedal goes long or you see darkened fluid.
Real-world note: Many newcomers report “brake fade” when it’s actually fluid boiling. Fluid is low-cost compared to rotors and calipers—and it’s foundational for safety.
3) Pads matched to your pace (and a realistic rotor plan)
Track pads aren’t just “more aggressive”—they’re designed to work at higher temperatures. The wrong compound can crumble, glaze, or eat rotors. Budget planning includes rotors as consumables.
- Dual-duty compromise: If you drive to the track, choose a pad known for manageable noise/dust but adequate heat capacity for your weight and speed.
- Bring spares: If you’re unsure, bring an extra set of front pads for your first two events.
- Rotor reality: Expect quicker rotor wear once you step into true track compounds.
Actionable tip: Measure pad thickness before and after each day; log it. A simple wear rate (mm per track day) makes your budget predictable.
4) The underrated mod: an alignment that respects tire temperature
Most street alignments prioritize tire life and stability, not repeated high-load cornering. A mild track-friendly alignment can reduce outside-edge tire destruction and improve turn-in.
- Front camber: As much negative camber as your factory adjustability allows, within reasonable street drivability.
- Toe: Minimal toe for stability and tire life; tiny toe-out can sharpen response but can increase tire wear.
Real-world example: Drivers often “cord” the outer shoulders of front tires on FWD and heavy AWD cars. Adding negative camber frequently doubles usable track life on the front axle.
5) Tire pressure is a tuning tool—log it like data, not vibes
Pressure management is a free lap-time tool. Overinflated tires overheat and slide; underinflated tires can feel vague and generate excess shoulder heat.
- Check pressures cold, then immediately after coming off track.
- Make changes in small steps (1–2 psi) and test one end of the car at a time.
- Use chalk on sidewalls to see rollover and adjust accordingly.
Actionable tip: Create a “hot pressure target” for your tire model and stick to it. The goal is consistency session-to-session, not chasing a magic number.
6) “200-treadwear” isn’t a guarantee—choose tires for your climate and car
Extreme performance summer tires (often marketed around 200 treadwear) have become the default track-day choice, but they behave very differently across brands and temperatures.
- Hot climates: Some popular 200TW tires can get greasy when overheated.
- Cool mornings: Others struggle to generate grip until warm.
- Heavy cars: Tire selection matters more because heat builds faster.
Actionable tip: If you’re new, prioritize a tire known for predictable breakaway and heat tolerance over ultimate peak grip. A tire you can read is faster than a tire that surprises you.
7) Brake cooling: DIY-friendly and shockingly effective
If you’re repeatedly cooking front brakes, targeted airflow can be more effective than jumping to larger calipers. Simple ducting or backing-plate solutions help delay fade and extend pad/rotor life.
- Focus on getting air to the center of the rotor hat (not just the face).
- Inspect after each day—ducting can rub tires or tear at full steering lock.
Budget logic: Spending modestly on cooling can save you money on consumables over the season.
8) Fluids and filters: make “boring” your performance strategy
Heat and sustained high RPM punish old oil, marginal coolant, and neglected filters. The goal isn’t exotic fluids—it’s freshness and consistency.
- Oil: Change before a major event weekend; monitor level more often than you would on the street.
- Coolant: Verify concentration and consider track-appropriate coolant strategy where allowed.
- Air filter: A clean filter maintains repeatable power; many “high-flow” filters don’t help if they’re dirty or poorly sealed.
Actionable tip: Track days can consume oil. Check at every fuel stop, and don’t start a session near the minimum mark.
9) Seat time with structure: the “one change per session” rule
Chasing setup without a plan leads to confusion. Use a simple experiment method:
- Change only one variable per session (pressures, brake bias setting, damper clicks, etc.).
- Run a consistent warmup lap routine and cooldown lap routine.
- Write one sentence after each session: “What limited me?”
Real-world example: Many intermediate drivers get faster simply by repeating the same braking markers and focusing on exit speed—not by adding parts.
10) Use data lightly: lap timer + notes beat expensive telemetry (at first)
You don’t need pro-level telemetry to improve. A basic lap timer app and a notebook often deliver 80% of the benefit.
- Track consistency (variance) rather than only best lap.
- Mark “traffic laps” so you don’t chase misleading times.
- Use video to confirm lines and braking points.
Actionable tip: If you add one sensor, start with tire pressure/temperature checks (even a simple probe) and brake pad thickness measurements. That’s actionable data.
11) Fuel strategy: don’t starve the pump in long corners
Some cars experience fuel starvation below a certain tank level during sustained cornering. It can feel like misfire or hesitation and can be dangerous for engines under load.
- Start sessions with more fuel than you think you need.
- Watch for repeatable hesitation in the same corners.
- Research known platform fixes: surge tanks, pump upgrades, or baffled solutions.
Actionable tip: If your platform is known for starvation, treat “half tank” as empty on track until proven otherwise.
12) Noise limits and event rules: plan before you buy exhaust parts
Many tracks enforce strict sound limits, and getting black-flagged can ruin your day. Before spending on an exhaust, check local track dB rules and how they’re measured (distance, angle, static vs. drive-by).
- Choose solutions that can be quieted (removable silencer, valved systems, resonators).
- Have a backup plan (turn-down tip, bolt-in muffler section).
Resource idea: If you want broader context on how transportation and vehicles are evolving—impacting regulations, noise conversations, and market trends—browse reporting and explainers at The New York Times.
13) Consumables budgeting: the “cost per track day” worksheet
Track driving becomes sustainable when you can predict costs. Create a simple worksheet with:
- Tires: purchase price / expected track days
- Pads: front + rear price / expected track days
- Rotors: price / expected track days (or events)
- Fluid: cost per flush / number of events between flushes
- Fuel: gallons per day x local price
Actionable tip: After each event, update your actual wear rates. Within 2–3 events, you’ll have a realistic per-day number, which helps you decide whether a pricier tire that lasts longer is actually cheaper in the long run.
Quick “first track day” checklist (budget-friendly essentials)
- Fresh high-temp brake fluid + confirmed firm pedal
- Pad thickness measured and recorded
- Torque wrench + correct socket; torque lug nuts before first session
- Pressure gauge + portable inflator
- Basic tools, painter’s tape for numbers, and a notepad
- Helmet that meets event requirements
- Extra engine oil and water
Conclusion: Build speed with systems, not just parts
Fast, repeatable lap times come from a car that stays consistent over an entire session—and a driver who makes changes with intention. If you’re prepping on a budget, prioritize brake fluid, pads, tires, and alignment, then layer in cooling and data habits as your pace rises. Treat consumables as part of the plan, keep logs, and you’ll spend less money chasing problems and more time doing what matters: driving.

The Micro-Adventure Roundup: 17 Unusual, Science-Backed Ways to Reset Your Week (Without Taking Vacation)
Why micro-adventures are trending (and why they actually work)
Not everyone can disappear for a week-long trip, but almost everyone can carve out 30 minutes to a few hours to do something different. That’s the idea behind micro-adventures: short, local experiences that feel meaningfully “elsewhere” without the planning load, cost, or time off. They’re trending because they fit modern schedules and still deliver many of the benefits people seek from travel: novelty, movement, social connection, and a break in routine.
Micro-adventures work best when they’re designed with intention. A random errand run doesn’t count. But a purposeful change in environment, a small skill challenge, or a nature-based reset can shift mood and perception quickly. Below is a roundup of practical, specific micro-adventure formats—most doable within 5–20 miles of home—plus tips and simple ways to measure whether they’re improving your week.
How to pick the right micro-adventure (a 3-minute checklist)
- Time box: Decide up front: 30 minutes, 90 minutes, or 3 hours. Boundaries make it easier to actually go.
- One “new” element: New place, new route, new skill, new companion, or new time of day.
- Minimum viable kit: Bring the least you need so it stays frictionless.
- Recovery plan: If it’s physically demanding, schedule a light evening afterward (stretch, hydrate, early sleep).
- Document one detail: A short note, a voice memo, or a single photo. The goal is recall, not content creation.
17 creative micro-adventures you can try this month
1) The “Reverse Commute” sunrise loop
What it is: Pick a route you normally drive for work or errands. Walk, jog, or cycle it at sunrise when it’s quiet.
Why it works: Familiar environments feel new at different times of day, and morning light can set a calmer tone for the day.
- Action tip: Keep it short—20 to 40 minutes—so it’s repeatable.
- Real-world example: If your commute is 8 miles, do a 2-mile “highlight segment” instead of forcing the full distance.
2) The “two-turn rule” neighborhood drift
What it is: Leave your front door and at every intersection take two turns you’ve never taken before (or rarely). End when your time box ends, then navigate home.
Why it works: It injects novelty without needing a destination—perfect when you’re mentally tired.
- Action tip: Bring a charged phone and water; keep it safe and simple.
3) The “sound map” park session
What it is: Sit in a park for 15 minutes and list every distinct sound you hear (wind, birds, distant traffic, footsteps). Then walk a loop and do it again in a new spot.
Why it works: It trains attention and makes a small green space feel rich and immersive.
- Action tip: Use a notes app and score each sound as “near” or “far” to gamify it.
4) The “micro-hike” with a single objective
What it is: A short trail walk with one goal: find a specific feature (a creek crossing, a lookout, a certain tree species, a bridge).
Helpful reference: If you want inspiration for how landscapes form and why certain regions look the way they do, browsing features and explainers on National Geographic’s environment and science coverage can add context that makes a local walk feel like a field expedition.
- Action tip: Pick a trail that takes under 60 minutes round trip; the objective makes it feel “complete.”
5) The “one-tool picnic”
What it is: Pack a simple meal and bring only one “tool” that upgrades it (a thermos of tea, a small blanket, or a portable coffee kit). Eat outdoors even if it’s just a bench.
Why it works: A small ritual change turns ordinary food into an experience.
- Action tip: Choose a spot with a view—water, elevation, or just an open field.
6) Night-walk “constellation lite”
What it is: A 20–45 minute walk after dark, focused on finding just one thing in the sky (the Moon phase, a bright planet, or a recognizable constellation).
Why it works: Night changes the sensory profile of familiar streets; looking up breaks the “scroll posture.”
- Action tip: Wear reflective gear and choose well-lit, safe routes.
7) The 5K “landmark ladder”
What it is: Create a short route that hits 5 small landmarks (a mural, old building, bridge, trailhead sign, historic marker). Move between them at an easy pace.
Why it works: It’s a scavenger hunt that doubles as light cardio.
- Action tip: Save the route as a named list in your maps app for reuse.
8) The “gearless skills” session (balance + mobility)
What it is: 20 minutes in a grassy area doing simple movement drills: single-leg balance, slow lunges, controlled squats, hip openers, and ankle mobility.
Why it works: Low-impact training improves resilience and is easier to stick with than all-or-nothing workouts.
- Action tip: Use a timer: 40 seconds work / 20 seconds rest for 10 rounds.
9) The “bridge-to-bridge” river/creek route
What it is: Walk or ride from one bridge to another, staying close to the water as much as possible.
Why it works: Water features create a natural narrative (source, flow, crossings) that feels like progress.
- Action tip: Pack a small trash bag and pick up 5 pieces of litter along the way—instant community impact.
10) The “coffee shop triathlon” (walk + taste test)
What it is: Visit three local cafés in one morning or afternoon, ordering the same item each time (e.g., drip coffee, espresso, iced tea) and noting differences.
Why it works: It’s a sensory adventure and supports local businesses.
- Action tip: Bring a notebook and rate aroma, acidity, sweetness, and vibe on a 1–5 scale.
11) The “public art circuit” with a theme
What it is: Find 5–10 murals or sculptures and choose a theme: color (all blues), subject (animals), or era (older plaques).
Why it works: The theme adds focus and reduces decision fatigue.
- Action tip: Search your city’s public art map or use “mural near me” and build a loop.
12) The “silent hour” at a botanical garden or arboretum
What it is: One hour with your phone on airplane mode in a plant-rich environment.
Why it works: Removing digital interruptions can make time feel longer and more restorative.
- Action tip: If you don’t have a garden nearby, choose the greenest local park and do a slow lap.
13) The “two-stop farmers market” meal plan
What it is: Buy ingredients for a simple dinner using only two vendor stops (e.g., produce + protein). Challenge yourself to keep it under a set budget.
Why it works: Constraints boost creativity and reduce overwhelm.
- Action tip: Pick a budget like $20 and build a meal around one seasonal ingredient.
14) The “library expedition” (one aisle, one topic)
What it is: Go to the library and choose a single aisle/topic you never read. Borrow one book and read 10 pages the same day in a nearby park or café.
Why it works: It’s novelty for the mind, not just the body.
- Action tip: Try something adjacent to your interests but not identical—e.g., if you love performance, read about sleep science or nutrition history.
15) The “industrial archaeology” walk
What it is: Explore old rail lines, warehouses, canals, depots, or manufacturing districts and look for evidence of how the area used to work.
Why it works: You’re turning your city into a story—what was made here, how it moved, and why the layout looks the way it does.
- Action tip: Search “historic district map” + your town and match what you see to older street grids.
16) The “stairs and viewpoints” session
What it is: Find a set of public stairs, a stadium staircase, or a hillside path. Do 10–20 minutes of easy repeats, then end with a viewpoint rest.
Why it works: Short intensity boosts mood, and finishing with a view provides a satisfying “reward loop.”
- Action tip: Keep the pace conversational; the goal is energized, not wrecked.
17) The “friend swap” activity (shared micro-adventure)
What it is: You invite a friend to your favorite local spot; next week they pick theirs. Keep it under 2 hours.
Why it works: Shared novelty strengthens connection, and rotating hosts removes planning fatigue.
- Action tip: Each person brings one “tiny upgrade” (snack, playlist, trivia, or a mini-challenge like identifying three birds).
Make it stick: a simple 4-week micro-adventure plan
If you want micro-adventures to become a repeatable reset (instead of a one-off), structure them lightly:
- Week 1: Choose one movement-based option (stairs + viewpoint, landmark ladder, reverse commute loop).
- Week 2: Choose one nature-based option (sound map, micro-hike objective, bridge-to-bridge).
- Week 3: Choose one culture-based option (public art circuit, industrial archaeology, library expedition).
- Week 4: Choose one social option (friend swap, coffee shop triathlon with a buddy).
Quick metric that matters: Before and after, rate your stress and energy from 1–10. If the average “after” score isn’t improving by week 2, shorten the time box or reduce complexity (less driving, fewer stops, simpler goals).
Common obstacles (and fixes that actually work)
- “I don’t have time.” Start with 20 minutes. Short wins build the habit.
- “I’m too tired.” Pick low-effort options: one-tool picnic, sound map, library expedition.
- “My area is boring.” Add a constraint: a theme (color, era, water feature) or a single objective. Boredom often disappears with a mission.
- “Weather is bad.” Do indoor micro-adventures: library expedition, museum quick loop, or a new grocery store “world foods” aisle challenge.
Conclusion: small adventures, big leverage
Micro-adventures aren’t a replacement for deep rest or long travel, but they are high-leverage: small inputs that can noticeably improve mood, fitness, creativity, and connection—especially when life gets busy. Use the ideas above as a menu, keep your time box realistic, and add just one “new” element each time. In a month, you’ll likely have a short list of go-to resets you can deploy whenever your week starts to feel repetitive.
Your next adventure doesn’t need a plane ticket. It needs a plan that’s small enough to start today.
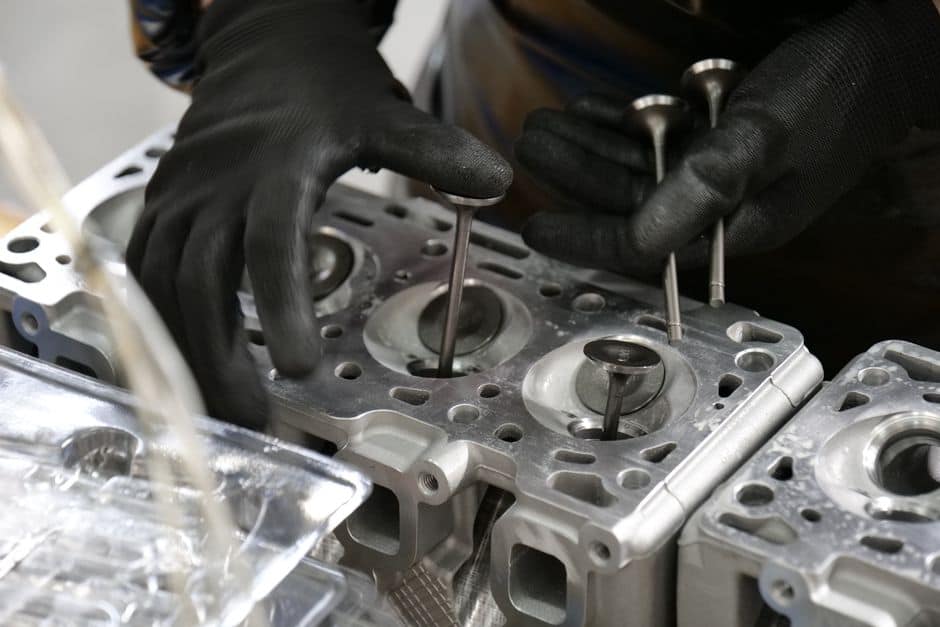
Engine Cleaning Showdown: Walnut Blasting vs Chemical Induction vs Fuel Additives (What Actually Fixes Carbon Buildup?)
Carbon Buildup Is the New “Hidden” Service Item — Especially on Direct-Injection Engines
Modern engines have become impressively efficient, but that efficiency comes with trade-offs. One of the most common (and misunderstood) issues we see in mechanical services today is carbon buildup on intake valves and in intake tracts—particularly on gasoline direct-injection (GDI) engines. If your vehicle feels sluggish, idles rough, or has intermittent misfires that don’t disappear with new spark plugs, carbon deposits may be a root cause.
Unlike older port-injected engines, many GDI setups spray fuel directly into the combustion chamber, meaning the intake valves don’t get “washed” by gasoline. Oil vapors from the PCV system and blow-by gases can bake onto valve surfaces over time, creating deposits that disrupt airflow and fuel mixing. The result can be reduced performance and drivability issues—even if the vehicle is relatively new.
This has created a booming market for intake cleaning services, but not all methods work the same. Below is a comparison of three common approaches: walnut blasting, chemical induction cleaning, and fuel system additives. We’ll explain where each method shines, where it falls short, what it costs in real-world terms, and how to choose the right service for your vehicle.
Quick Comparison: Three Approaches to Carbon Cleaning
- Walnut blasting: Physical removal of deposits from intake valves using crushed walnut shells and compressed air.
- Chemical induction cleaning: Solvent-based cleaner introduced through the intake to dissolve/soften deposits.
- Fuel additives: Detergents added to the fuel tank intended to clean injectors and combustion chamber deposits.
Option 1: Walnut Blasting (Intake Valve Media Blasting)
What it is
Walnut blasting uses crushed walnut shells propelled by compressed air to scrub carbon off the intake valves. It’s performed with the intake manifold removed (or partially moved aside), and the technician rotates the engine so each cylinder’s intake valves are closed before blasting.
Where it works best
- Heavier GDI valve deposits causing misfires, cold-start stumble, or poor idle.
- Vehicles with recurring carbon issues where “quick” cleaning hasn’t helped.
- Preemptive maintenance around 40,000–70,000 miles (varies by driving style and engine design).
Pros
- Most thorough valve cleaning method for GDI intake valves because it physically removes deposits.
- Immediate and measurable results are common: smoother idle, improved throttle response, reduced misfire counts.
- Targeted: focuses on the intake valve area where GDI engines often need help.
Cons
- Labor-intensive: intake manifold removal increases time and cost.
- Requires experience and proper equipment to prevent debris issues and ensure valves are closed during blasting.
- Not a “forever fix”: carbon can return if underlying causes (oil vapor, driving pattern) remain.
Real-world cost & time expectations
Costs vary by vehicle layout. On many 4-cylinder engines, walnut blasting can be a half-day job; on tighter V6/V8 packaging it can be longer. In most markets, owners typically see pricing in a few hundred dollars to over a thousand depending on access, labor rates, and whether gaskets/bolts are replaced.
Actionable tip: confirm the diagnosis first
If you’re paying for a premium service, confirm that deposits are actually the issue:
- Ask for a borescope inspection of the intake valves (many shops can document with photos).
- Scan for misfire counters and fuel trim readings—carbon often shows up as rough cold starts and random misfires.
- Rule out basics: vacuum leaks, ignition coils, and injector issues can mimic carbon symptoms.
Option 2: Chemical Induction Cleaning (Intake/Top-End Cleaning)
What it is
Chemical induction cleaning introduces a solvent through the intake system (often via a vacuum port or throttle body) while the engine runs. The cleaner is intended to dissolve or soften carbon deposits in the intake tract, on valves, and sometimes in the combustion chamber.
Where it works best
- Light to moderate deposits or as an interim step when symptoms are mild.
- Port-injected engines where the intake valves already see fuel wash, and deposits are less severe.
- Maintenance on engines prone to intake soot from EGR systems (more common on some designs).
Pros
- Lower cost than walnut blasting and generally quicker.
- Less disassembly, making it a practical option for frequent maintenance.
- Can improve drivability if deposits are not heavily caked.
Cons
- Inconsistent results on heavy GDI valve buildup: solvents often can’t fully dissolve thick, baked-on deposits.
- Risk of loosened debris if large chunks break free (a reputable shop uses correct procedure and avoids over-aggressive dosing).
- May create a “feels better for a bit” effect if the root cause persists.
Real-world example: when it’s the right call
If a daily-driven commuter car has minor hesitation and the intake valves show only early-stage deposits, chemical induction cleaning can be a cost-effective first step—especially if paired with improved oil change intervals and a PCV system inspection. But if the valves look like they’re wearing a thick, crusty coating, chemical methods are often a partial fix at best.
Actionable tip: pair it with a data-driven before/after check
To avoid paying for “feelings,” ask the shop to document improvement:
- Compare idle stability and misfire counts before/after.
- Check short-term and long-term fuel trims for improvement in airflow consistency.
- If available, request a quick borescope re-check on one cylinder to confirm deposit reduction.
Option 3: Fuel Additives (Detergent Treatments in the Tank)
What it is
Fuel additives typically contain detergents designed to clean fuel injectors, intake ports (on port-injected engines), and combustion chamber deposits. They’re simple to use and widely marketed as a cure-all.
Where it works best
- Injector cleanliness and spray pattern maintenance (especially if fuel quality is inconsistent).
- Combustion chamber deposits that can contribute to knocking in some engines.
- Preventive maintenance as part of an overall plan, not as a standalone fix for heavy valve carbon.
Pros
- Lowest cost and easiest to apply.
- Can help maintain injector performance and reduce hesitation related to poor atomization.
- Useful in high-mileage vehicles where gradual deposit control is the goal.
Cons
- Often does not clean GDI intake valves because fuel never touches those valves in many designs.
- Quality varies—some additives are mostly marketing, while others contain meaningful detergent packages.
- Won’t fix an existing severe drivability issue caused by thick valve deposits.
Data point: why fuel quality matters
Fuel formulation and detergent levels can vary by region and brand. Industry reporting regularly highlights how fuel markets and refinery output affect gasoline supply and characteristics. For ongoing context on energy markets and fuel-related developments, resources like Reuters energy market coverage can be useful to consumers who want to understand broader trends that may influence pricing and availability.
Actionable tip: treat additives as “maintenance,” not “repair”
If your engine is already misfiring, idling poorly, or throwing lean/rich codes, don’t rely on an in-tank additive as the primary solution. Instead:
- Diagnose first (scan tool + smoke test for intake leaks if needed).
- Use additives after repairs/cleaning to help slow future deposit formation.
- Consider using Top Tier fuel consistently if it’s available in your area (often a better long-term approach than random additive use).
Which Method Should You Choose? A Practical Decision Guide
Choose walnut blasting if:
- Your vehicle is GDI and has confirmed heavy valve deposits via borescope.
- You have cold-start misfires, rough idle, or persistent hesitation not solved by ignition service.
- You want the most complete reset of intake valve condition.
Choose chemical induction cleaning if:
- Deposits are light to moderate, symptoms are mild, and you want a lower-cost step.
- You’re combining it with improved maintenance habits (oil intervals, PCV checks).
- Your engine design responds well to top-end cleaning and access is straightforward.
Choose fuel additives if:
- Your goal is injector and combustion chamber maintenance, not intake valve restoration.
- You’re trying to prevent performance loss over time rather than fix a current major issue.
- You use them as part of a broader plan: quality fuel, correct oil, and timely service.
Preventing Carbon Buildup: Practical Steps That Actually Help
- Shorten oil change intervals if your driving is mostly short trips. Short-trip driving increases moisture and fuel dilution, which can increase vapor and deposit formation.
- Check the PCV system: a failing or poorly designed PCV setup can increase oil vapor ingestion. A technician can verify proper function and look for excessive oil in intake plumbing.
- Drive it like it’s meant to be driven (occasionally): periodic longer drives at full operating temperature can reduce moisture accumulation and help keep systems functioning as designed.
- Address misfires early: misfires can accelerate deposit formation and damage catalysts. Early diagnosis saves money.
Conclusion: The “Best” Carbon Cleaning Method Depends on What You’re Trying to Clean
Carbon cleaning isn’t one-size-fits-all. If your goal is to remove heavy intake valve deposits on a GDI engine, walnut blasting is typically the most effective option because it physically removes buildup. Chemical induction cleaning can be a smart middle-ground for lighter deposits and regular maintenance, while fuel additives are best viewed as preventive support for injectors and combustion cleanliness—not a direct fix for GDI intake valve carbon.
The most cost-effective strategy is to start with verification (borescope + scan data), choose the method that matches the severity of deposits, and then apply prevention steps that reduce how quickly carbon returns. Done correctly, carbon cleaning can restore drivability, improve idle quality, and help your engine deliver the performance it was designed to provide.
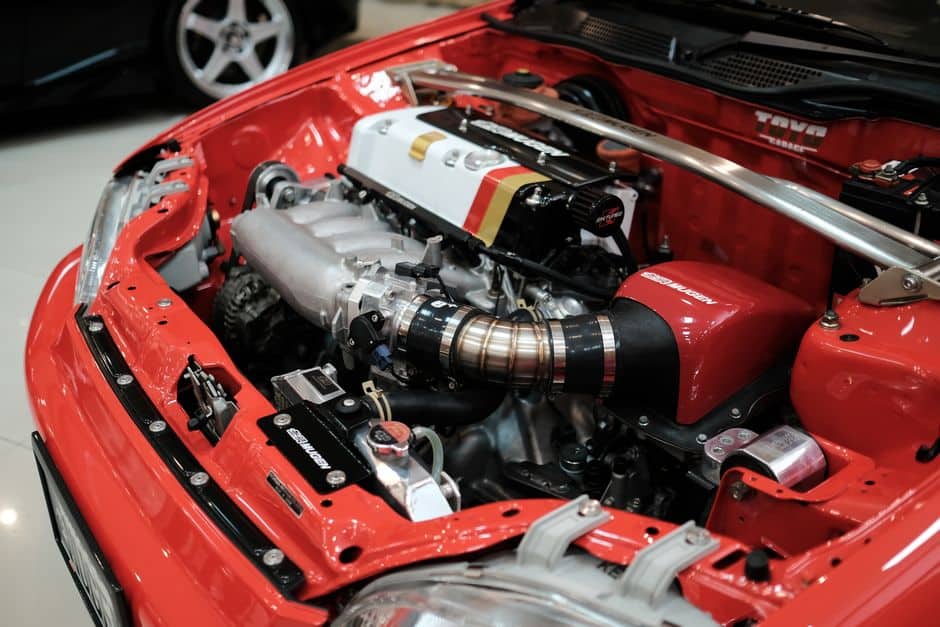
Thermal Management Shootout: Ceramic Coating vs Titanium Wrap vs Heat Shields for Turbo & Exhaust Temps
Why thermal management is the quiet performance mod everyone’s copying
In motorsport, heat is both a byproduct and a weapon. The same exhaust energy that spools a turbo and makes power can also cook wiring, fade brake fluid, heat-soak an intake, and shorten the life of every rubber and plastic component under the hood. That’s why thermal management has become a “stealth trend” across grassroots track days, time attack builds, rally cars, and endurance paddocks: it improves repeatability.
Rather than chasing peak horsepower, more teams are chasing lap-to-lap consistency. If your car pulls hard on lap 2 but feels soft by lap 6, you don’t have a power problem—you have a heat problem. Below is a practical comparison of three common approaches used to control turbo and exhaust heat: ceramic coating, titanium (basalt) exhaust wrap, and bolt-on heat shields. We’ll look at what they do best, what they do poorly, and how to pick the right combination for your goals.
The contenders: three ways to control exhaust and turbo heat
1) Ceramic coating (inside/outside coatings on manifolds, turbine housings, downpipes)
What it is: A thin, baked-on thermal barrier coating applied to exhaust components—often both internal and external surfaces depending on the part and process.
Why racers like it: It’s clean, long-lasting, and doesn’t trap moisture against the metal the way some wraps can. The goal is to keep heat in the exhaust stream (helping velocity) and reduce radiant heat into the engine bay.
Best for:
- Turbo manifolds and turbine housings where reducing under-hood radiant heat matters
- Cars that see wet conditions (rally, endurance, or street-driven track cars)
- Builders who want a “set it and forget it” solution with minimal maintenance
Potential drawbacks:
- Requires part removal and professional prep; DIY rattle-can “ceramic” products rarely compare to pro coatings
- Not always cheap, especially if coating inside/outside multiple parts
- Coating quality varies by shop; poor prep can lead to flaking
Actionable tip: If you’re coating a turbo manifold, ask the shop whether they recommend coating the inside as well as the outside. Internal coatings can help reduce heat transfer into the metal itself, but only if the prep and process are right for that alloy and the expected EGT range.
2) Titanium/basalt exhaust wrap (often called “titanium wrap”)
What it is: A high-temperature woven wrap (commonly basalt fiber) that insulates headers/downpipes by physically wrapping the tubing.
Why racers like it: It’s a fast, relatively low-cost way to reduce radiant heat near sensitive components (brake master cylinders, clutch hydraulics, intake piping, wiring looms). It’s also popular because you can apply it in your garage.
Best for:
- Downpipes close to the firewall or steering column
- Track cars that need a quick solution between events
- Builds where protecting nearby components matters more than long-term aesthetics
Potential drawbacks:
- Can trap moisture and contaminants against the metal, increasing corrosion risk—especially on mild steel
- May accelerate cracking in thin-wall tubing by increasing heat cycling severity (hotter tube, larger gradients)
- Needs periodic inspection; it can fray, loosen, or soak fluids if you have leaks
Actionable tip: If you wrap, do it like an endurance team: overlap consistently (often ~25–50%), use stainless locking ties, and re-torque fasteners after a full heat cycle. Also, address oil/coolant leaks first—wrap can hold fluids and create smoke or even fire risk.
3) Heat shields (formed metal barriers, often with air gaps and reflective layers)
What it is: A physical shield—aluminum, stainless, or multi-layer composites—placed between heat sources and sensitive components. Many shields use reflective surfaces plus an air gap, which is extremely effective at cutting radiant heat.
Why racers like it: Shields are predictable, inspectable, and don’t change the thermal stress in the exhaust tube as aggressively as wrap. They also protect everything behind them, not just the part they’re attached to.
Best for:
- Protecting brake/clutch hydraulics, wiring, and composite parts
- Street-driven track cars that need serviceability
- Areas where you can mount a shield without rattles or interference
Potential drawbacks:
- Space constraints can make proper air gaps difficult
- Cheap reflective stick-on materials can peel when exposed to oil and heat
- Improper mounting can lead to vibration cracks or annoying rattles
Actionable tip: The secret sauce is the air gap. A reflective shield with a small stand-off often works better than a reflective layer stuck directly to a hot surface. Think of it as giving heat fewer paths to travel.
Side-by-side comparison: how each option performs where it counts
Goal #1: reduce engine bay radiant heat
- Best: Heat shields (with air gap) + ceramic coating
- Good: Exhaust wrap (especially on downpipes near the firewall)
Why: Radiant heat is line-of-sight energy. A barrier that reflects/blocks radiation (shield) is often the most direct solution. Ceramic coating lowers emitted heat from the surface, and wrap reduces surface temperature by insulating the pipe.
Goal #2: improve repeatability in long sessions (heat soak control)
- Best: Ceramic coating + strategic shielding around intakes and reservoirs
- Good: Wrap, but watch component longevity and inspect frequently
Real-world baseline: On many track builds, a common symptom is intake air temperature (IAT) creeping 20–40°F (11–22°C) over a session depending on intercooler efficiency, ambient temps, and engine bay heat. Reducing radiant heat around intake piping, airboxes, and intercooler end tanks can slow that rise. The exact benefit varies wildly by platform, but even modest improvements can preserve timing and power.
Goal #3: protect adjacent components (wiring, fluids, composites)
- Best: Heat shields (broad protection)
- Good: Wrap (localized), ceramic coating (reduces source heat)
Practical example: If your brake master cylinder sits near a turbo/downpipe (common in some engine swaps), a shield mounted to the chassis with an air gap can reduce the heat load dramatically. Pairing it with a coated turbine housing is a common “pro” solution because it attacks heat at the source and blocks what remains.
Goal #4: reliability and maintenance effort
- Best: Ceramic coating + well-mounted shields
- Most maintenance: Wrap (inspect for fraying, contamination, corrosion)
Reality check: Motorsport is brutal. Vibration and heat cycling will test any solution. If you run endurance events or drive your track car on the street in wet conditions, coating + shielding usually wins for long-term sanity.
Data-driven thinking: heat is energy, and energy has consequences
Even if you don’t have access to lab equipment, you can measure and manage heat like a team:
- Use temperature paint or stickers on critical components (brake reservoirs, coil packs, nearby wiring). They provide max-temperature history per session.
- Log IAT, coolant temp, oil temp, and (if you have it) EGT. Look for trends: do temps stabilize or continue climbing?
- IR thermometer checks in the paddock: measure the same points after each session to see whether your change actually reduced surface temps.
Heat management is also a lesson in the physics of energy transfer—conduction, convection, and radiation—and that’s why broader science resources can be surprisingly useful. If you want a clear, accessible refresher on how heat moves in the real world, National Geographic’s science coverage is a solid place to explore the fundamentals and related climate/energy topics that mirror what we deal with in race cars.
Which approach should you choose? Three build profiles that make the decision easy
Profile A: Time Attack / sprint racing (short sessions, maximum attack)
Recommended combo: Ceramic coating on manifold + turbine housing, plus a targeted heat shield for the hottest “line-of-sight” areas.
- Coating keeps the bay cooler and can help maintain exhaust energy to the turbo.
- A small, well-placed shield protects reservoirs and wiring without adding much weight.
Where wrap fits: Only where packaging forces your hand (tight downpipe near steering rack), and ideally on stainless tubing rather than mild steel.
Profile B: Endurance racing / track-day cars that must be serviceable
Recommended combo: Heat shields first, ceramic coating second.
- Shields make inspections easy: you can see cracks, leaks, and fasteners.
- Coating reduces radiant heat without adding materials that can absorb fluids.
Where wrap fits: As a last resort for hot spots—apply it neatly, then schedule inspections (every event or two) like you would with brake pads.
Profile C: Rally / wet conditions / mixed-surface motorsport
Recommended combo: Ceramic coating + robust shields with secure mounting.
- Wrap can hold water/mud and accelerate corrosion; it also hides damage.
- Coating plus shielding tends to survive grime, water, and vibration better.
Bonus tip: In rally, prioritize shielding for anything safety-critical: brake lines, fuel lines, and bulkhead pass-throughs.
Common mistakes (and how to avoid them)
- Wrapping a leaking system: Fix oil/coolant leaks first. Wrap can wick fluids and create smoke or fire risk.
- No air gap on shields: A shield pressed against a hot pipe becomes a conductor. Use stand-offs.
- Ignoring the rest of the bay: Managing exhaust heat but leaving unprotected wiring looms nearby is half a solution.
- Over-insulating thin-wall headers: If your tubing is thin and already prone to cracking, aggressive wrap can shorten its life. Consider coating + shielding instead.
Conclusion: the best thermal strategy is usually a smart combination
There’s no single “winner” because ceramic coating, wrap, and heat shields solve different parts of the heat problem. If you want the most balanced motorsport setup, a proven path is: reduce heat at the source (ceramic coating), then block what remains (heat shields with air gaps), and reserve wrap for packaging emergencies or specific hot spots where nothing else fits.
Above all, treat thermal management like any other performance upgrade: set a goal (lower IAT creep, protect brake fluid, reduce bay temps), measure before/after, and adjust. The payoff isn’t just comfort or tidiness—it’s the ability to run the same lap time again and again when it matters.
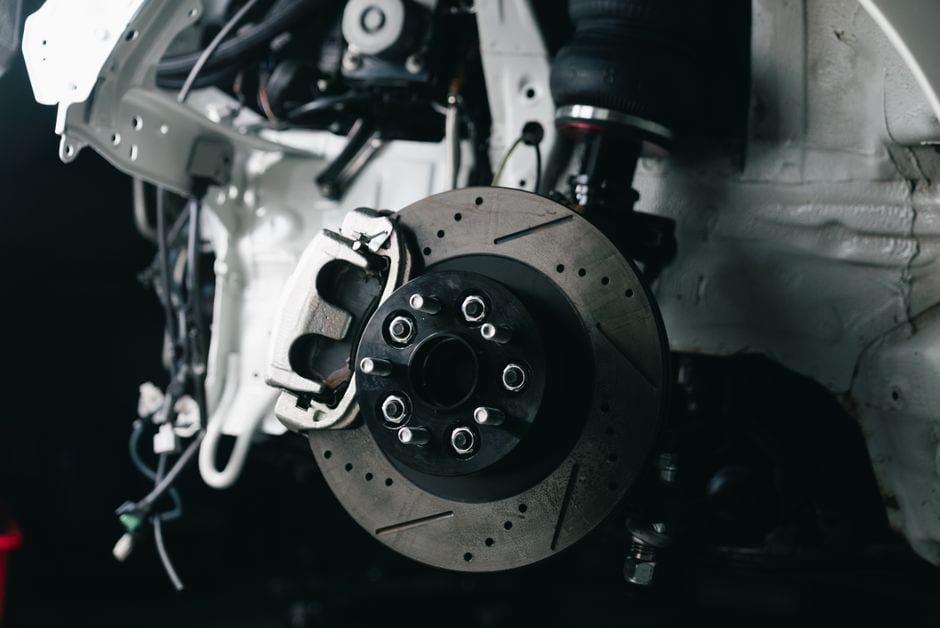
Brake Dust, Heat Fade & Track-Day Safety: An FAQ Guide to Choosing Pads, Fluid, and Cooling for Street-Driven Performance Cars
What’s the real problem behind “my brakes feel fine… until they don’t” on spirited drives?
Many street-driven performance cars have brakes that feel strong in daily commuting but become inconsistent during repeated hard stops—like a mountain descent, a hot highway off-ramp run, or a short autocross/track session. The issue is usually heat management, not “weak brakes.” When you brake hard, the friction converts kinetic energy into heat. If that heat overwhelms the pad compound, fluid, rotors, or cooling airflow, you’ll experience:
- Pad fade: The pad compound outgasses or loses friction at high temperatures. Pedal feels normal, but stopping power drops.
- Fluid fade: Brake fluid boils, creating compressible vapor bubbles. Pedal becomes long/spongy and can sink.
- Glazing: Overheated pads/rotors develop a smooth surface that reduces friction and can squeal.
- Uneven deposits (often miscalled “warped rotors”): Pad material transfers inconsistently to the rotor, causing vibration under braking.
Practical takeaway: if your braking performance changes as things get hot, focus first on pads, fluid, and cooling—not just bigger calipers.
How can I estimate how much heat my brakes are dealing with (without a lab)?
You can do a simple “energy reality check” to understand why heat adds up fast. Kinetic energy increases with the square of speed. That means a stop from 80 mph involves roughly (80/40)² = 4× the energy of a stop from 40 mph.
Actionable method: Think in “repeated stop” scenarios:
- One hard stop from high speed might be manageable.
- Three to five hard stops back-to-back (or long downhill braking) can overwhelm street pads and fluid quickly.
If you want a more hands-on approach, use inexpensive temperature paint on calipers/rotors or IR temperature readings (immediately after a stop, safely). Even basic data helps you choose pads and fluid more intelligently.
Why is brake dust suddenly such a hot topic in performance circles?
Brake dust has always existed, but it’s receiving more attention because:
- Wheel finishes and detailing culture make dust more noticeable (especially on light-colored wheels).
- EV adoption highlights dust as a non-exhaust particulate source; with fewer tailpipe emissions, other sources stand out.
- Health and environmental scrutiny has increased on particulate matter in urban areas.
In practical terms for enthusiasts, the “dust conversation” is really about tradeoffs: high-friction, track-capable pads often dust more and make more noise, while low-dust pads can sacrifice high-temp bite.
Do low-dust pads actually work for spirited driving?
They can—if you’re honest about your use case. Many modern low-dust ceramic or hybrid compounds deliver excellent cold bite and smooth daily driving. The limitation is sustained high-temperature operation.
Rule of thumb:
- Daily + occasional on-ramp fun: quality low-dust pads can be perfect.
- Mountain runs + repeated hard stops: choose a performance street pad with a higher temp ceiling.
- Track days: run a true track pad (and expect more dust/noise) or swap pads for events.
Real-world example: Drivers who do canyon runs often report that quiet, low-dust pads feel great for the first few corners, then require noticeably more pedal effort once heat builds. A performance street compound may dust more, but stays consistent longer.
Is brake fluid really that important if I upgrade pads?
Yes—brake fluid is frequently the hidden failure point. Pads can only do their job if the hydraulic system stays stable. Most factory fluids are fine for commuting but can boil during aggressive driving, especially if they’ve absorbed moisture over time.
Actionable tips:
- Look for fluid with a higher dry and wet boiling point.
- Flush fluid on a schedule: many enthusiasts do every 12 months, and track drivers often do before events.
- Don’t mix random fluids unless compatible; use a known, reputable spec and fully flush when switching.
If you’ve ever felt a firm pedal turn long after a few hard stops, fluid should be your first suspect—often before calipers or rotors.
What’s the smartest “street + track day” brake setup without wasting money?
A cost-effective approach is to optimize the system in layers instead of jumping straight to a big-brake kit:
- High-temp fluid + proper bleed (biggest reliability gain per dollar)
- Pads matched to your heat range (performance street or dual-purpose)
- Quality rotors (often OEM-style blanks are excellent; drilled rotors can crack under repeated heat cycling)
- Brake cooling (ducting or improved airflow management if your car supports it)
Real-world scenario: Many drivers of heavier performance sedans find that upgrading fluid and pads prevents fade more effectively than cosmetic rotor changes. Big-brake kits shine when you need higher thermal mass and sustained high-speed stopping, but they aren’t always the first best step.
What is “pad transfer” and why do people think their rotors are warped?
True rotor warping is less common than most people think. Often, vibration under braking comes from uneven pad material deposition on the rotor surface. This creates thickness variation that feels like a warp.
How it happens: Hard braking followed by sitting stationary with hot pads clamped to hot rotors (like stopping at a light after a highway pull) can imprint material.
How to reduce it:
- Perform a proper bedding-in procedure for new pads and rotors (manufacturer instructions matter).
- After aggressive braking, do a short cooldown drive and avoid holding the pedal hard at a stop if safe to do so.
- If vibration starts, sometimes re-bedding can clean it up—other times rotors need resurfacing or replacement.
How do I choose pads based on temperature range if manufacturers don’t make it clear?
Not every brand publishes temperature charts, but you can still choose wisely using observable characteristics and your driving profile.
Use these decision cues:
- Cold bite priority? Daily drivers need strong cold bite; track pads can feel wooden when cold.
- Noise tolerance? High-friction compounds often squeal—especially at low speeds.
- Dust tolerance? More bite often equals more dust; decide what you’re willing to clean.
- Rotor wear: Some aggressive compounds can be harder on rotors.
Actionable tip: If you’re doing a single track day every few months, consider a dedicated track pad set and swap them at the event. It’s more work, but it can save you from living with noisy, dusty pads every day.
Can brake cooling actually beat a big brake kit for real-world performance?
In many cases, yes. Cooling reduces peak temps and slows heat soak, helping prevent pad and fluid fade. A big brake kit increases thermal mass and often improves leverage and clamping consistency, but it can be expensive and sometimes adds wheel fitment constraints.
Cooling wins when:
- You’re overheating pads/fluid but your hardware is otherwise solid.
- Your track is tight/technical with repeated braking zones (less time for airflow cooldown).
- Your car supports ducting to the rotor hat/center for efficient airflow.
Practical examples: Many track-focused builds run simple front brake ducts that deliver fresh air to the rotor center. That can noticeably extend pad life and reduce fade, especially on heavier cars or on hot days.
What’s the connection between brake dust, air quality, and where the industry is heading?
As tailpipe emissions decrease across the fleet, attention is increasingly turning to non-exhaust emissions like tire and brake wear. That matters for regulations, materials development, and what pad options will be common in the future.
For a mainstream look at how transportation, policy, and consumer trends intersect, major outlets occasionally cover these shifts; for example, The New York Times reporting on transportation and environmental policy can provide useful context on why particulate pollution sources beyond exhaust are being discussed more often.
What this means for drivers: Expect more “eco” pad compounds, more emphasis on low-dust/low-wear formulations, and potentially more OEM strategies that blend regen braking (on hybrids/EVs) with friction brakes to reduce dust.
What quick maintenance checks reduce fade risk before a spirited weekend drive?
Before a hard-driving weekend, these checks provide a strong safety payoff:
- Pad thickness: Don’t start a spirited trip with pads near the wear indicators.
- Rotor condition: Look for deep cracks, severe scoring, or heavy lip edges.
- Fluid age: If you can’t remember the last flush, assume it’s due.
- Brake hoses: Inspect for cracking, swelling, or rubbing. Stainless lines can improve feel, but proper installation is critical.
- Tire condition: Tires are part of your stopping system—if grip is low, ABS will intervene sooner and stopping distances rise.
Actionable tip: After any brake work, do a low-speed function test in a safe area to confirm pedal firmness and consistent braking before returning to normal roads.
How do I balance clean wheels with confident braking—what’s the “best compromise” setup?
A common compromise for street-driven performance cars is:
- A performance street pad known for stable bite and moderate dust
- High-quality DOT 4 (or higher-performance) fluid with regular flushes
- OEM-style blank rotors for durability and predictable behavior
- Cooling awareness: avoid dragging brakes downhill; use engine braking where appropriate
If your priority is very low dust, choose a premium low-dust pad—but accept that repeated high-temp stops may reveal limitations. For many drivers, the ideal “one-pad solution” doesn’t exist; instead, the best solution is matching parts to how you actually drive.
Conclusion: What should I upgrade first for safer, more consistent braking?
If you want braking you can trust on spirited drives without throwing money at random parts, start with the fundamentals: fresh high-boiling-point fluid, pads suited to your real heat load, and good rotors with correct bedding. If you still encounter fade, add cooling before assuming you need a full big-brake kit. This approach keeps your car daily-friendly while making performance braking more repeatable—exactly what most street-driven enthusiast builds need.

How to Build a Personal “Micro-Protocol” for Better Decisions Under Pressure (A 10-Step Guide)
Why a “Micro-Protocol” Beats Motivation When Life Gets Fast
When you’re under pressure—late to a meeting, dealing with family stress, navigating a tight deadline—your brain tries to save energy by defaulting to habits. That’s great when your habits are solid, and brutal when they’re not. A personal micro-protocol is a short, repeatable checklist (30–120 seconds) that tells you exactly what to do when you feel rushed, reactive, or overwhelmed.
This guide walks you through building a practical micro-protocol you can use anywhere: at work, in the garage, during a conflict, or before making a purchase. Think of it like a pit-lane routine for your mind—simple steps that reduce mistakes when it counts.
Step-by-Step: Create Your Personal Micro-Protocol
1) Pick one high-stakes moment you want to handle better
Start narrow. If you try to fix your entire life at once, you’ll end up with a long checklist you never use. Choose one moment that reliably creates bad decisions. Examples:
- Responding to a stressful email or message
- Impulse-buying tools, gadgets, or upgrades you don’t truly need
- Handling conflict at home when you’re already tired
- Making a fast call when you’re driving or multitasking
Action: Write a one-sentence trigger: “I need a protocol for when I’m about to _______ and I feel rushed/angry/anxious.”
2) Define the “fail state” you want to avoid
A micro-protocol is easier to follow when you know what it’s protecting you from. Describe the failure in plain language.
- “I send a snarky reply and damage a relationship.”
- “I spend $300 to feel better for 10 minutes.”
- “I agree to something I can’t deliver, then scramble for days.”
Tip: Put a number on it if you can: “This mistake typically costs me 2 hours,” or “This mistake costs me $50–$500.” Numbers make the protocol feel real.
3) Identify your early warning signals (physical + behavioral)
Most poor decisions have a “tell”—a body cue or habit that shows up right before you go off-track. Common ones:
- Tight jaw, shallow breathing, or shoulders creeping up
- Rereading a message multiple times to “find the insult”
- Opening shopping apps or adding items to cart quickly
- Talking faster, interrupting, or mentally rehearsing arguments
Action: List 3 signals you can notice in under 5 seconds. Your protocol begins the moment you spot any one of them.
4) Choose a “reset move” that takes under 20 seconds
Your reset move is a quick action that interrupts autopilot. Keep it simple. Options that work in real life:
- Physiological sigh: inhale, top-up inhale, long exhale (2 rounds)
- Hands reset: unclench fists, relax jaw, drop shoulders
- Visual reset: look at a fixed point 10 feet away for 5 seconds
- Posture reset: stand up or plant both feet flat and sit tall
Practical note: If you need a quiet option in public, the jaw/shoulder reset is almost invisible but surprisingly effective.
5) Add a single “time buffer” rule
The fastest way to improve decisions under pressure is to introduce a small delay. You’re not avoiding action—you’re buying clarity.
- 30-second rule: wait 30 seconds before sending any reactive message
- 2-minute rule: if it feels urgent, take 2 minutes to write a draft, then re-read
- 24-hour rule: for purchases over a set amount (e.g., $100), wait 24 hours
Example: If you often impulse-buy “must-have” gear, set a threshold: “Over $150 requires 24 hours + one quick comparison check.” Over time, this saves real money without restricting genuinely good purchases.
6) Write a “two-question filter” to guide the decision
This is the heart of the micro-protocol. Two questions is enough to redirect your thinking without turning it into homework. Choose questions that match your trigger.
- For messages/conflict: “What outcome do I want in 7 days?” and “What reply moves us closer to that?”
- For purchases: “What problem am I solving?” and “What’s the cheapest valid way to solve it?”
- For commitments: “What am I trading off to say yes?” and “What does ‘yes’ specifically include?”
Tip: If you can’t answer both questions clearly, default to delaying the decision.
7) Add one “reality check” using an external reference
Pressure can distort your sense of risk and importance. A reality check pulls you back to facts. This can be:
- Looking up a benchmark price range before buying
- Checking your calendar before agreeing to a deadline
- Reading one credible source before reacting to a headline
Actionable option: If your trigger involves reacting to breaking news, use a trusted wire service for a quick factual baseline. Many people use Reuters reporting for straightforward updates before forming opinions or making decisions that depend on accurate information.
8) Decide your “minimum effective response” (MER)
Under pressure, people tend to overreact (too much) or freeze (too little). Your MER is the smallest action that still moves things forward.
- Email MER: “I saw this—can confirm by 3pm.”
- Conflict MER: “I want to answer well; I need 10 minutes.”
- Purchase MER: “Save to wishlist + compare two alternatives.”
Real-world example: If you’re tempted to fire off a long defensive response, your MER might be a single calm sentence and a promise to follow up after reviewing details.
9) Script your protocol on a card (or phone note) in fewer than 60 words
The micro-protocol should be readable in one glance. Use simple language. Here’s a template you can copy and customize:
- Trigger: “If I feel rushed/angry before replying…”
- Reset: “Drop shoulders + 2 long exhales.”
- Buffer: “Wait 2 minutes.”
- Questions: “What do I want in 7 days? What reply gets me there?”
- MER: “Reply with one calm sentence or ask for time.”
Tip: Put it where you’ll actually see it: pinned note, lock screen text, wallet card, or a sticky note near your workstation.
10) Test it for 7 days, then refine with a simple score
Your first version won’t be perfect—and that’s the point. Run it like a quick experiment.
Daily scoring method (takes 10 seconds):
- 0 = I forgot the protocol
- 1 = I used part of it
- 2 = I used the full protocol
After 7 days, look for one friction point:
- Was the reset move too complicated?
- Was the buffer rule unrealistic?
- Were the two questions unclear?
Refine one piece only and run another 7-day test. Micro-protocols get powerful through iteration, not perfection.
Two Example Micro-Protocols You Can Steal
Example A: The “Reactive Message” Protocol
- Trigger: Heart rate up + urge to reply instantly
- Reset: Relax jaw + 2 slow exhales
- Buffer: 2 minutes before sending
- Questions: “What outcome do I want next week?” + “What’s the most respectful clarification question?”
- MER: “Thanks—can you clarify X so I respond accurately?”
Example B: The “Impulse Buy” Protocol
- Trigger: Adding to cart fast + rationalizing (“It’s basically an investment”)
- Reset: Stand up + drink water
- Buffer: 24 hours for purchases over $150
- Questions: “What problem am I solving?” + “What’s a $0–$30 workaround?”
- MER: Save to wishlist + compare 2 alternatives tomorrow
Data point you can use: If you make just two fewer $200 impulse purchases per month, that’s $4,800/year—enough to fund training, travel, or a meaningful upgrade you actually planned.
Common Mistakes (and How to Avoid Them)
- Making it too long: If it can’t fit in a short note, it won’t get used.
- Picking vague triggers: “When I’m stressed” is too broad. Define a specific moment.
- Relying on willpower: The protocol should work even when you’re tired.
- Forgetting environment tweaks: If shopping is your issue, remove saved cards or uninstall the app for 7 days.
Conclusion: Small Protocols, Big Payoff
A personal micro-protocol is one of the simplest ways to get better results under pressure—without needing a complete lifestyle overhaul. By choosing one trigger, installing a fast reset, adding a buffer, and filtering your choice through two sharp questions, you build a repeatable system that improves your decisions when it matters most.
Write your first version today, keep it under 60 words, and test it for a week. The win isn’t being perfect—the win is catching yourself one step earlier than you did last time.