Brake Drag: the Overlooked Problem That Eats Pads, Warps Rotors, and Kills MPG
Brake drag happens when one (or more) wheels don’t fully release after you let off the brake pedal. It’s rarely dramatic at first—no grinding, no warning light, no “obvious” failure—yet it can quietly overheat rotors, glaze pads, boil brake fluid, and even cause pull-under-braking complaints that feel like alignment issues.
This guide is built for drivers and DIY-minded owners who want a structured, mechanical-services-style process to confirm brake drag and identify the likely cause without a workshop lift. It’s also ideal prep before booking a diagnostic appointment, because you’ll arrive with useful observations.
Tools and Safety Prep (Do This Before Step 1)
Gather the following:
- Quality tire pressure gauge
- Infrared thermometer (highly recommended) or careful “back of hand near wheel” heat check
- Floor jack and jack stands (never rely on the jack alone)
- Wheel chocks
- Gloves and eye protection
- Basic hand tools (lug wrench, flashlight)
- Brake cleaner and a rag (for visual inspection only; not a substitute for repair)
Safety note: You will be checking for heat. Hot wheels and rotors can burn skin instantly. Avoid touching metal components directly after a drive.
Step-by-Step: How to Confirm Brake Drag and Narrow Down the Cause
1) Confirm the Symptoms With a Controlled Test Drive
Choose a safe, low-traffic route. Your goal is to reproduce conditions where drag becomes noticeable, then collect data immediately after stopping.
- Drive 10–15 minutes at steady speed with minimal braking.
- Perform 3–5 moderate stops from ~40 mph (65 km/h) to ~10 mph (16 km/h). Avoid hard emergency braking.
- Pay attention to: steering pull, vibration, smell (hot/chemical), and whether the car feels “held back” when coasting.
Actionable tip: If the vehicle feels like it’s losing speed quickly when you lift off the throttle on flat ground, that can be a clue—especially if the sensation worsens as the drive continues.
2) Do a Four-Corner Wheel Heat Comparison (Your Best Quick Indicator)
Park on level ground, engage the parking brake only if needed for safety (note: the parking brake itself can be the cause of drag—see Step 7). Immediately measure wheel/rotor temperatures.
- Use an infrared thermometer aimed at the rotor hat area through the wheel spokes, or at the wheel face near the hub (consistent location for all four wheels).
- Write down all four readings.
What you’re looking for: One wheel significantly hotter than the others. In normal driving, some variation is expected, but a difference of 30–50°F (15–25°C) or more at one corner after similar braking is a strong brake-drag flag.
Real-world example: If three wheels read 140–165°F (60–74°C) and the front-right reads 230°F (110°C), that corner is doing extra work—often due to a sticking caliper slide, seized piston, or a restricted brake hose acting like a one-way valve.
3) Rule Out “False Drag” From Underinflation or a Bearing Issue
Before blaming the brakes, eliminate two common lookalikes.
- Tire pressure: Check all four and match the door-jamb placard. Underinflation increases rolling resistance and heat, and it can mask or mimic drag symptoms.
- Wheel bearing noise: A failing bearing can create heat and a growl that changes with speed and loading (gentle lane changes). Bearings can run hot, but typically won’t create the same “brake smell” or immediate heat spike after stops.
Actionable tip: If the wheel is hot only after braking events and cools more slowly than the others, that points more strongly to brake drag than tire pressure.
4) Perform the “Coast-Down” Check (Simple, Surprisingly Telling)
On a flat, safe road, accelerate to ~40 mph (65 km/h), then gently lift off the throttle and let the vehicle coast in gear (automatic) or in neutral (manual, only if safe/legal for your area). Do not brake.
- Note if the vehicle decelerates faster than expected.
- Repeat after a few normal stops.
Interpretation: Drag often worsens with heat. If the vehicle coasts normally when cold but feels “anchored” after a few stops, suspect brake drag.
5) Jack-Up Spin Test: Find the Dragging Corner Without Guessing
Once safely parked, chock the opposite wheels. Jack up one corner at a time and support it with a stand.
- With the transmission in neutral (and parking brake released), spin the wheel by hand.
- Compare resistance side-to-side on the same axle (front-left vs front-right, then rear-left vs rear-right).
What’s normal: Light pad contact is common on many disc brakes, so some faint rub is acceptable. What’s not normal is a wheel that stops quickly, feels “notchy,” or requires noticeably more force to rotate.
Actionable tip: If one wheel is hard to spin and also hotter in Step 2, you’ve confirmed the corner.
6) Identify the Most Likely Mechanical Cause (Based on What You Found)
Now narrow it down. Most brake drag issues fall into a few repeatable patterns:
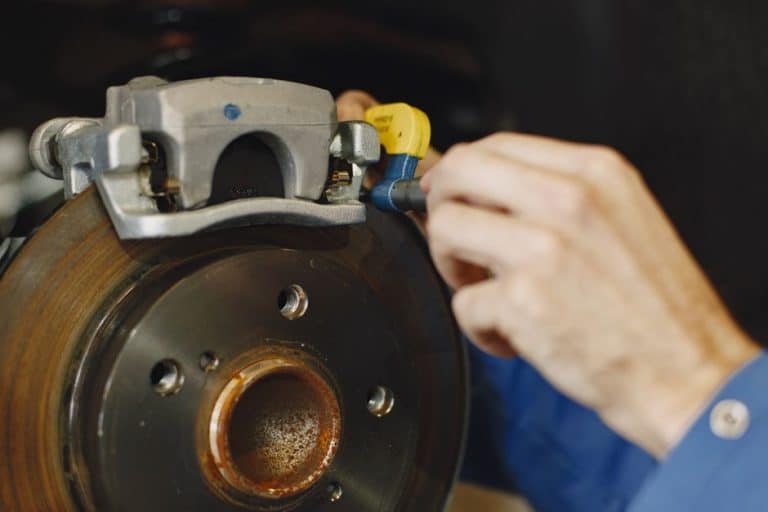
- Sticking caliper slide pins: Common after winter driving, water intrusion, or incorrect grease. Symptoms: uneven pad wear (one pad thinner), drag improves/worsens with steering or bumps.
- Seized caliper piston: Symptoms: persistent drag, one pad worn dramatically faster, heat severe, sometimes brake pull.
- Collapsed flexible brake hose: Internally damaged hose can allow pressure to apply but not release quickly. Symptoms: drag appears after braking, wheel remains hot, sometimes improves temporarily after cracking the bleeder (shop test).
- Parking brake mechanism sticking (rear): Symptoms: rear wheel heat, especially after parking or after using the parking brake; cable corrosion; lever at caliper not returning fully.
- Master cylinder/ABS hydraulic issue: Less common, but can hold pressure in a circuit. Symptoms: multiple wheels affected on the same circuit, pedal feel changes, drag across an axle.
7) Check for Parking Brake Drag the Right Way (Rear Brake Focus)
Rear drag is frequently caused by a parking brake cable that doesn’t return, especially in salty climates.
- With the rear safely lifted, verify the parking brake is fully released.
- Look at the cable routing for kinks, missing clips, or heavy corrosion.
- If your rear brakes use a caliper-mounted parking brake lever, confirm the lever returns to its stop.
Actionable tip: If you rarely use your parking brake, begin using it periodically (where safe) to keep the mechanism moving—stagnant mechanisms stick faster.
8) Inspect Pad Wear Patterns Without Disassembly (Quick Visual Clues)
Through the wheel spokes, use a flashlight to compare pad thickness (inner vs outer is harder to see, but you can still catch obvious differences on many setups).
- Outer pad very thin, inner pad thicker: slide pin or bracket binding (caliper can’t center).
- Both pads thin at one wheel: piston sticking or hose restriction keeping pressure applied.
- Blue/purple rotor tint or heat spots: repeated overheating events—drag is likely severe or long-standing.
Real-world data point: Brake components can exceed 500°F (260°C) under heavy use. Drag can sustain high temps for long periods, accelerating rotor cracking and fluid degradation.
9) Measure Fuel Economy and Rolling Resistance Changes (The “Cost” of Drag)
Brake drag is not just a safety concern—it’s a performance and running-cost problem.
- Track your average fuel economy for one week (or two tanks) as a baseline.
- If you suspect drag, repeat after repair.
Even mild drag can reduce efficiency because you’re converting fuel into heat at the wheel. As broader context for why efficiency matters and how transport energy use affects costs and emissions, reputable coverage and explainers can be found at BBC.
10) Decide: DIY Service vs. Book a Mechanical Inspection (And What to Tell the Shop)
Some brake drag fixes are within DIY range (clean/lube slide pins with the correct high-temp brake grease, replacing pads/rotors, replacing a cable), but many require professional judgment and tooling—especially anything involving hydraulic diagnosis.
Book a professional mechanical service immediately if:
- You recorded a wheel temperature that is 50°F (25°C)+ hotter than the others
- The car pulls hard, the steering wheel shakes during braking, or braking distance increases
- You smell burning, see smoke, or notice the wheel area discoloring
- The brake pedal feel changes (spongy, sinking, or unusually firm)
What to report to your technician (saves diagnostic time):
- Which wheel was hottest and by how much (your Step 2 readings)
- Whether drag worsens after a few stops (heat-related) or is constant
- Recent work: pads/rotors, calipers, brake fluid flush, wheel bearing replacement
- Driving conditions: heavy rain, winter salt exposure, track day, towing
Common Mistakes That Make Brake Drag Worse
- Ignoring it because the car “still stops fine”: Drag can be present while braking performance feels normal—until it suddenly doesn’t.
- Replacing pads only: If the root cause is a sticky piston or seized slides, new pads will overheat and wear rapidly.
- Using the wrong lubricant: Petroleum-based grease can swell rubber components. Use brake-specific products only.
- Over-torquing wheel nuts: Can distort rotors and create vibrations that mask the real issue.
Conclusion: Diagnose Methodically, Then Fix the Cause—Not Just the Symptoms
Brake drag is one of those problems that hides in plain sight: a slight loss of coast-down, a faint smell after a commute, one wheel that’s mysteriously hotter than the rest. By doing a controlled test drive, a four-corner heat comparison, and a careful jack-up spin test, you can pinpoint the dragging corner and provide clear, actionable information for repair.
At Lasco Motorsport, we recommend treating any confirmed drag as urgent—not because it always feels dramatic, but because the mechanical and thermal damage compounds quickly. Diagnose early, repair correctly, and you’ll restore braking safety, reduce wear, and reclaim performance.