Intermittent faults are the hardest problems in mechanical services—here’s a repeatable way to catch them
Intermittent issues (a random misfire, a warning light that vanishes, a “sometimes” no-start, a vibration that appears only on certain roads) waste time because they don’t fail on demand. Many cars arrive at workshops with a vague description—“it did it once”—and the vehicle behaves perfectly on the hoist. The solution is to stop hunting symptoms and start collecting evidence.
This guide shows a practical, step-by-step “Drive Log Method” used by professional technicians to reproduce and isolate intermittent faults. It’s designed for real-world conditions and modern vehicles, and it minimizes parts-swapping by turning a mystery into measurable data.
Tools you’ll need (simple and workshop-friendly)
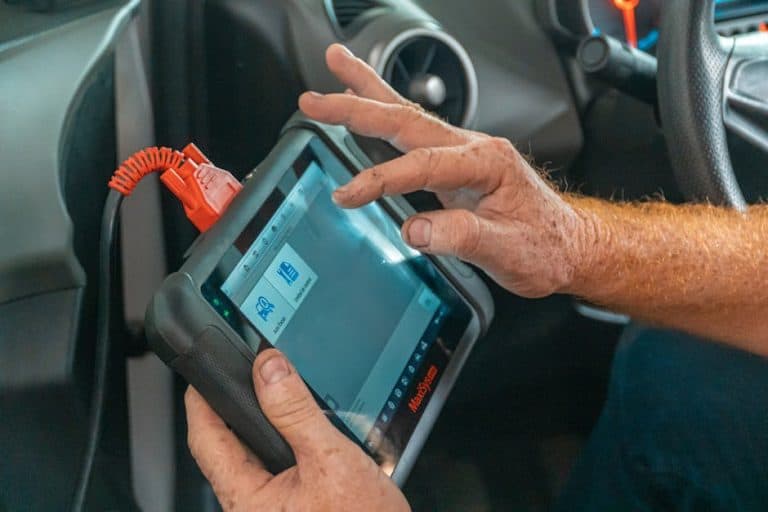
- OBD-II scanner capable of live data + freeze-frame reading (even a mid-tier unit is fine)
- A phone for notes/voice memo and (optional) GPS speed logging
- Basic hand tools + torch
- Contact cleaner and dielectric grease (for connector-related faults)
- Multimeter (ideally with min/max capture)
- Tyre pressure gauge and tread depth gauge (for vibration/handling complaints)
Step-by-step: The Drive Log Method to diagnose intermittent faults
1) Classify the fault into a “failure family” before touching anything
Start by putting the complaint into one category. This prevents you from checking everything and missing the obvious.
- Starts/runs: intermittent no-start, stall, hesitation, misfire
- Electrical: random warning lights, instrument cluster resets, infotainment dropouts
- Heat-related: occurs only hot/cold, after idling, after highway driving
- Road-speed related: vibration, wobble, noise that changes with speed not RPM
- Load-related: occurs when towing, uphill, full throttle, AC on
Actionable tip: Ask the driver to describe it using “when/where/how often” rather than “what it feels like.” Example: “It stumbles only at 80–90 km/h, light throttle, after 20 minutes.” That’s gold.
2) Pull codes and freeze-frame—then do not clear anything yet
Even if the MIL is off, many vehicles store pending codes. Read:
- Stored DTCs
- Pending DTCs
- Freeze-frame data (RPM, coolant temp, load, fuel trims, speed)
- Mode $06 (if your tool supports it) for misfire counts, catalyst efficiency tests, etc.
Why it matters: Freeze-frame is a snapshot of the conditions when the ECU decided something was wrong. It often reveals that the fault occurs at a specific temperature band (e.g., coolant 92–98°C) or under a certain load (e.g., 35–45%).
3) Build a one-page “reproduction recipe”
Create a simple checklist that makes the fault happen on purpose. Use your freeze-frame and driver interview to define:
- Temperature: cold start vs fully warm
- Speed window: e.g., 60–70 km/h
- Gear: e.g., 5th gear, torque converter locked
- Load: light/medium/heavy throttle
- Electrical load: headlights, rear demister, AC on/off
- Road condition: smooth vs rough (helps identify loose connections)
Real-world example: A vehicle that cuts out only when braking hard from highway speeds may point toward battery terminal movement, poor chassis ground, or a brake booster vacuum issue—your recipe should include repeated decel events, not just cruising.
4) Choose 6–10 live data PIDs to log (don’t drown in data)
Logging too many parameters makes it harder to spot the moment things go wrong. Pick the most revealing signals for your fault family:
- Misfire/hesitation: STFT/LTFT, MAF (g/s), MAP (kPa), RPM, ignition timing, O2 sensor voltage or lambda, misfire counters (if available)
- Stall/no-start: RPM signal during crank, battery voltage, fuel rail pressure (if available), throttle position
- Electrical resets: system voltage, charging current (if available), CAN communication errors (some scanners show U-codes and network status)
- Overheating/heat soak: coolant temp, intake air temp, fan command, vehicle speed
Data point to remember: A healthy charging system typically maintains roughly 13.8–14.7V when running (varies by smart alternator strategy). If your log shows dips toward the low 12s during events (especially with loads), you’ve found a direction.
5) Use a “shake test” and “heat test” to force the fault to show itself
Intermittents often come from marginal connections, cracked solder joints, or components that fail when hot.
- Shake test: With the engine idling, gently move wiring looms and connectors related to the symptom (MAF harness, coil connectors, battery terminals, grounds). Watch live data for dropouts.
- Heat test: After a drive, heat-soak the suspected area (carefully) or let it heat naturally; many faults appear after shutdown + restart. Conversely, cold spray can help identify components that recover when cooled.
Workshop-safe rule: Never yank wires; apply small, controlled movement and focus on the connector body and strain relief.
6) Run the reproduction drive and mark “the moment”
Drive the recipe route. When the fault occurs, immediately note:
- Time stamp (or lap number)
- Speed/RPM
- Throttle position
- Road condition
- Any dash lights
Actionable tip: Use a voice memo: “Event at 12:42, 86 km/h, slight incline, AC on.” This syncs with the scanner’s time-based log so you can jump straight to the failure window.
7) Interpret patterns: what the data usually means
Now you’re not guessing—you’re diagnosing. Here are common patterns technicians look for:
- Fuel trim spike positive (lean) + MAF drops unexpectedly: possible intake leak, MAF issue, wiring/connector fault
- Fuel trim spike negative (rich) + misfire counts rise: leaking injector, ignition breakdown, plug/coil issue
- Battery voltage dips coincide with dash reset: poor battery connection, failing alternator, weak ground strap
- RPM signal glitches during crank (tach drops to zero briefly): crank sensor or wiring
- Coolant temp normal but IAT skyrockets at idle then hesitation: heat soak + airflow issue, possible fan control or under-bonnet heat management
Real-world example: If the engine stumbles only on corrugated roads and your log shows sudden MAF “dropouts” to near zero for a split second, that’s often a connector pin fitment issue rather than a failed sensor. Cleaning and properly tensioning terminals may solve it.
8) Confirm with one targeted test before replacing parts
Replace-as-you-go is expensive and often wrong. Confirm the suspect with a focused test:
- Voltage drop test across battery terminals and grounds under load (headlights + blower + rear demister)
- Wiggle test + multimeter min/max on sensor reference voltage or signal wire
- Smoke test for intake leaks when trims indicate lean under specific conditions
- Coil swap test only if misfire consistently follows a cylinder and data supports ignition breakdown
Practical benchmark: On many vehicles, excessive voltage drop on a main ground path under load is a major red flag. Even small resistances become big problems when current rises.
9) Fix the root cause, then repeat the exact same drive recipe
The verification drive should match the original conditions as closely as possible (temperature, route, load). Clear codes only after you’ve captured everything you need, then:
- Repeat the same route and operating window
- Log the same PIDs
- Confirm the fault does not reoccur
- Check readiness monitors if emissions-related work was performed
Actionable tip: Keep the “before” and “after” logs. They’re valuable for customer explanation and future diagnostics if the vehicle returns.
10) Turn your findings into a customer-friendly report (it builds trust and saves comebacks)
Intermittent issues are frustrating for customers because they feel random. A clear report reduces doubt and helps them approve the correct repair.
- Describe the reproduction recipe
- Show one or two key data points (e.g., voltage dip or fuel trim spike)
- Explain why the replaced/serviced component was the root cause
- Confirm the verification drive results
For a broader perspective on how vehicle reliability and maintenance costs affect everyday drivers, credible consumer reporting and analysis can help frame why structured diagnostics matter. A useful reference point for general automotive coverage and owner-impact stories is The Guardian’s motoring and transport reporting.
Common intermittent fault scenarios (and what to log first)
- Random warning lights after rain: log system voltage + scan for network U-codes; inspect fuse box and grounds for moisture ingress
- Vibration only at 90–110 km/h: check tyre pressures and road-force balance; inspect inner CV joints; note whether it changes on throttle vs coast
- Hot restart crank-but-no-start: log RPM while cranking + fuel pressure if available; consider crank sensor heat failure or fuel vapor issues on certain setups
- Stumble when AC cycles: log idle control, throttle angle, system voltage, and AC request; look for weak alternator or idle compensation problems
Conclusion: Intermittent problems aren’t random when you measure them
The difference between guessing and diagnosing is documentation. By building a reproduction recipe, logging a focused set of data, and validating with one targeted test, you can consistently solve intermittent faults while avoiding unnecessary parts replacement. The Drive Log Method turns “it happens sometimes” into a repeatable event you can observe, explain, and fix—exactly the standard professional mechanical services should deliver.